by Darren Collard | Apr 4, 2014
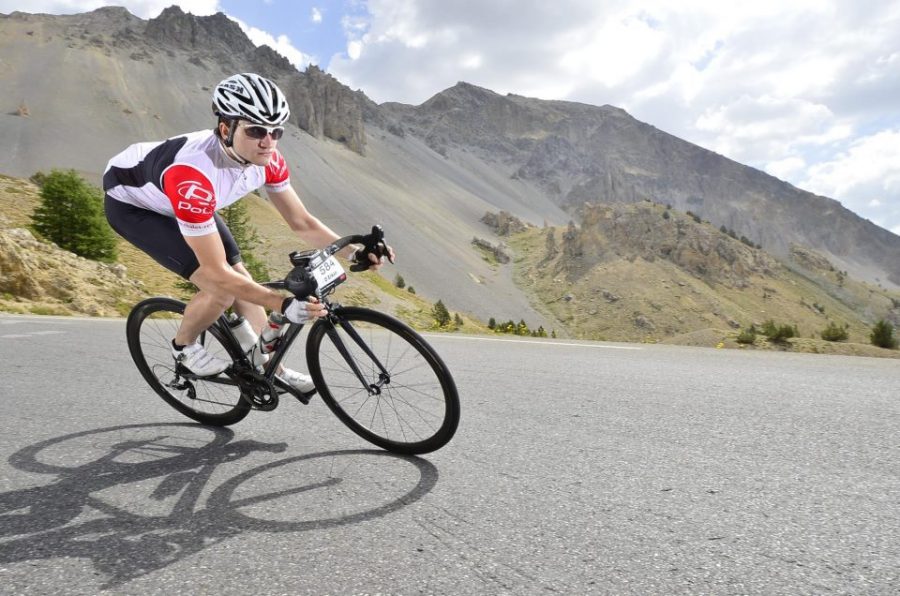
 With the constant rain that has become the norm here in the UK lately, it has become more important than ever to regularly clean your bike. This will not only reduce corrosion, but also limit the wear from those little bits of grit and muck that stick to the frame and components when cycling on wet roads.
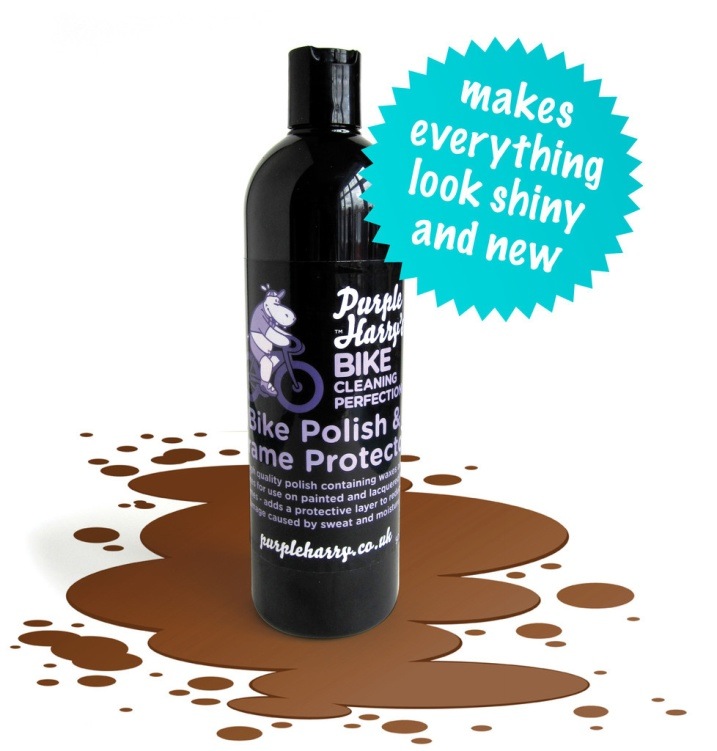
The UK produced Purple Harry Bike Polish will not only leave your bike sparkling, it also leaves a protective layer of waxes and silicones, adding an extra barrier to your paintwork which will make it easier to clean in the future too!
 Simply pour a small amount onto a clean soft cloth of your choice, apply to the bike in a circular motion and then wait for at least 5 minutes for the polish to dry, then buff off to reveal a gleaming silky smooth surface. Of course, as with any polish, avoid getting any on the braking surfaces and it’s not recommended for use on the saddle or brake levers!
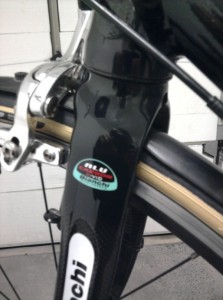
In the past I have only used the same polish as I use on my car (Turtle Wax), and have been pleased with the results, but I was very impressed with the Purple Harry Polish.
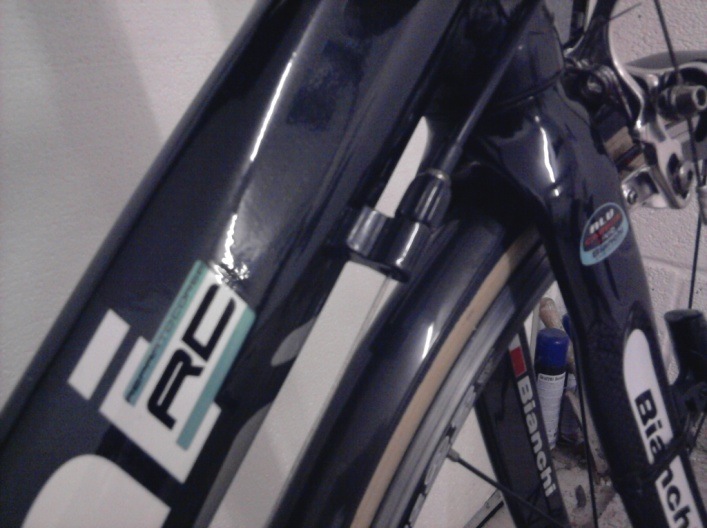
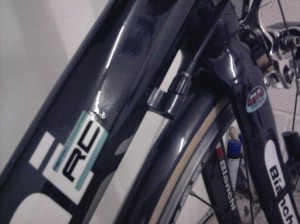
The crown on my carbon forks had minute scratches that always caught my eye in the past, but now they are gone, to be replaced by a nice deep black mirror like shine!
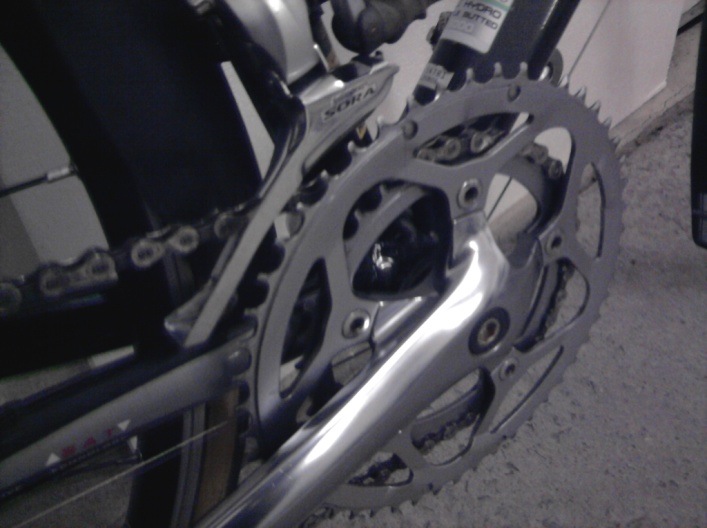
I also got a good finish when applying the polish to the painted Aluminium frame, carbon forks, Aluminium chainset and even plastic mudguards, so it can be used on most bike surfaces (take extra care if polishing wheel rims not to make the braking surface super slippery!).
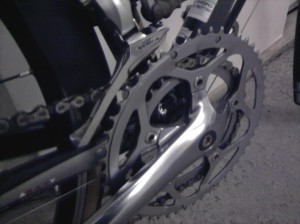
My bike has never looked so good, after using the Bike Floss sticks to clean the cassette and chain and now protecting every suitable surface with the Bike Polish, it is almost in ‘as new’ condition. This is impressive; when you consider that it is a 2008 bike that I bought secondhand, which gets used nearly every day, for either a weekend ride or my commute to work.
It is difficult to say how often you should apply the polish, I guess it depends on the weather conditions and how often the bike gets washed, and obviously you wouldn’t use it every time you clean the bike. Perhaps 3 to 4 times a year seems to me to be a sensible figure. The bottle should therefore last for years (Unless, because of the fantastic results, you go on to use it on your car, caravan, or boat too!).
 I really can’t find any negatives; it just works better than anything else I have tried before.
So, a first from me, a score of 100% for Purple Harry Bike Polish!
by Anna Magrath | Mar 27, 2014
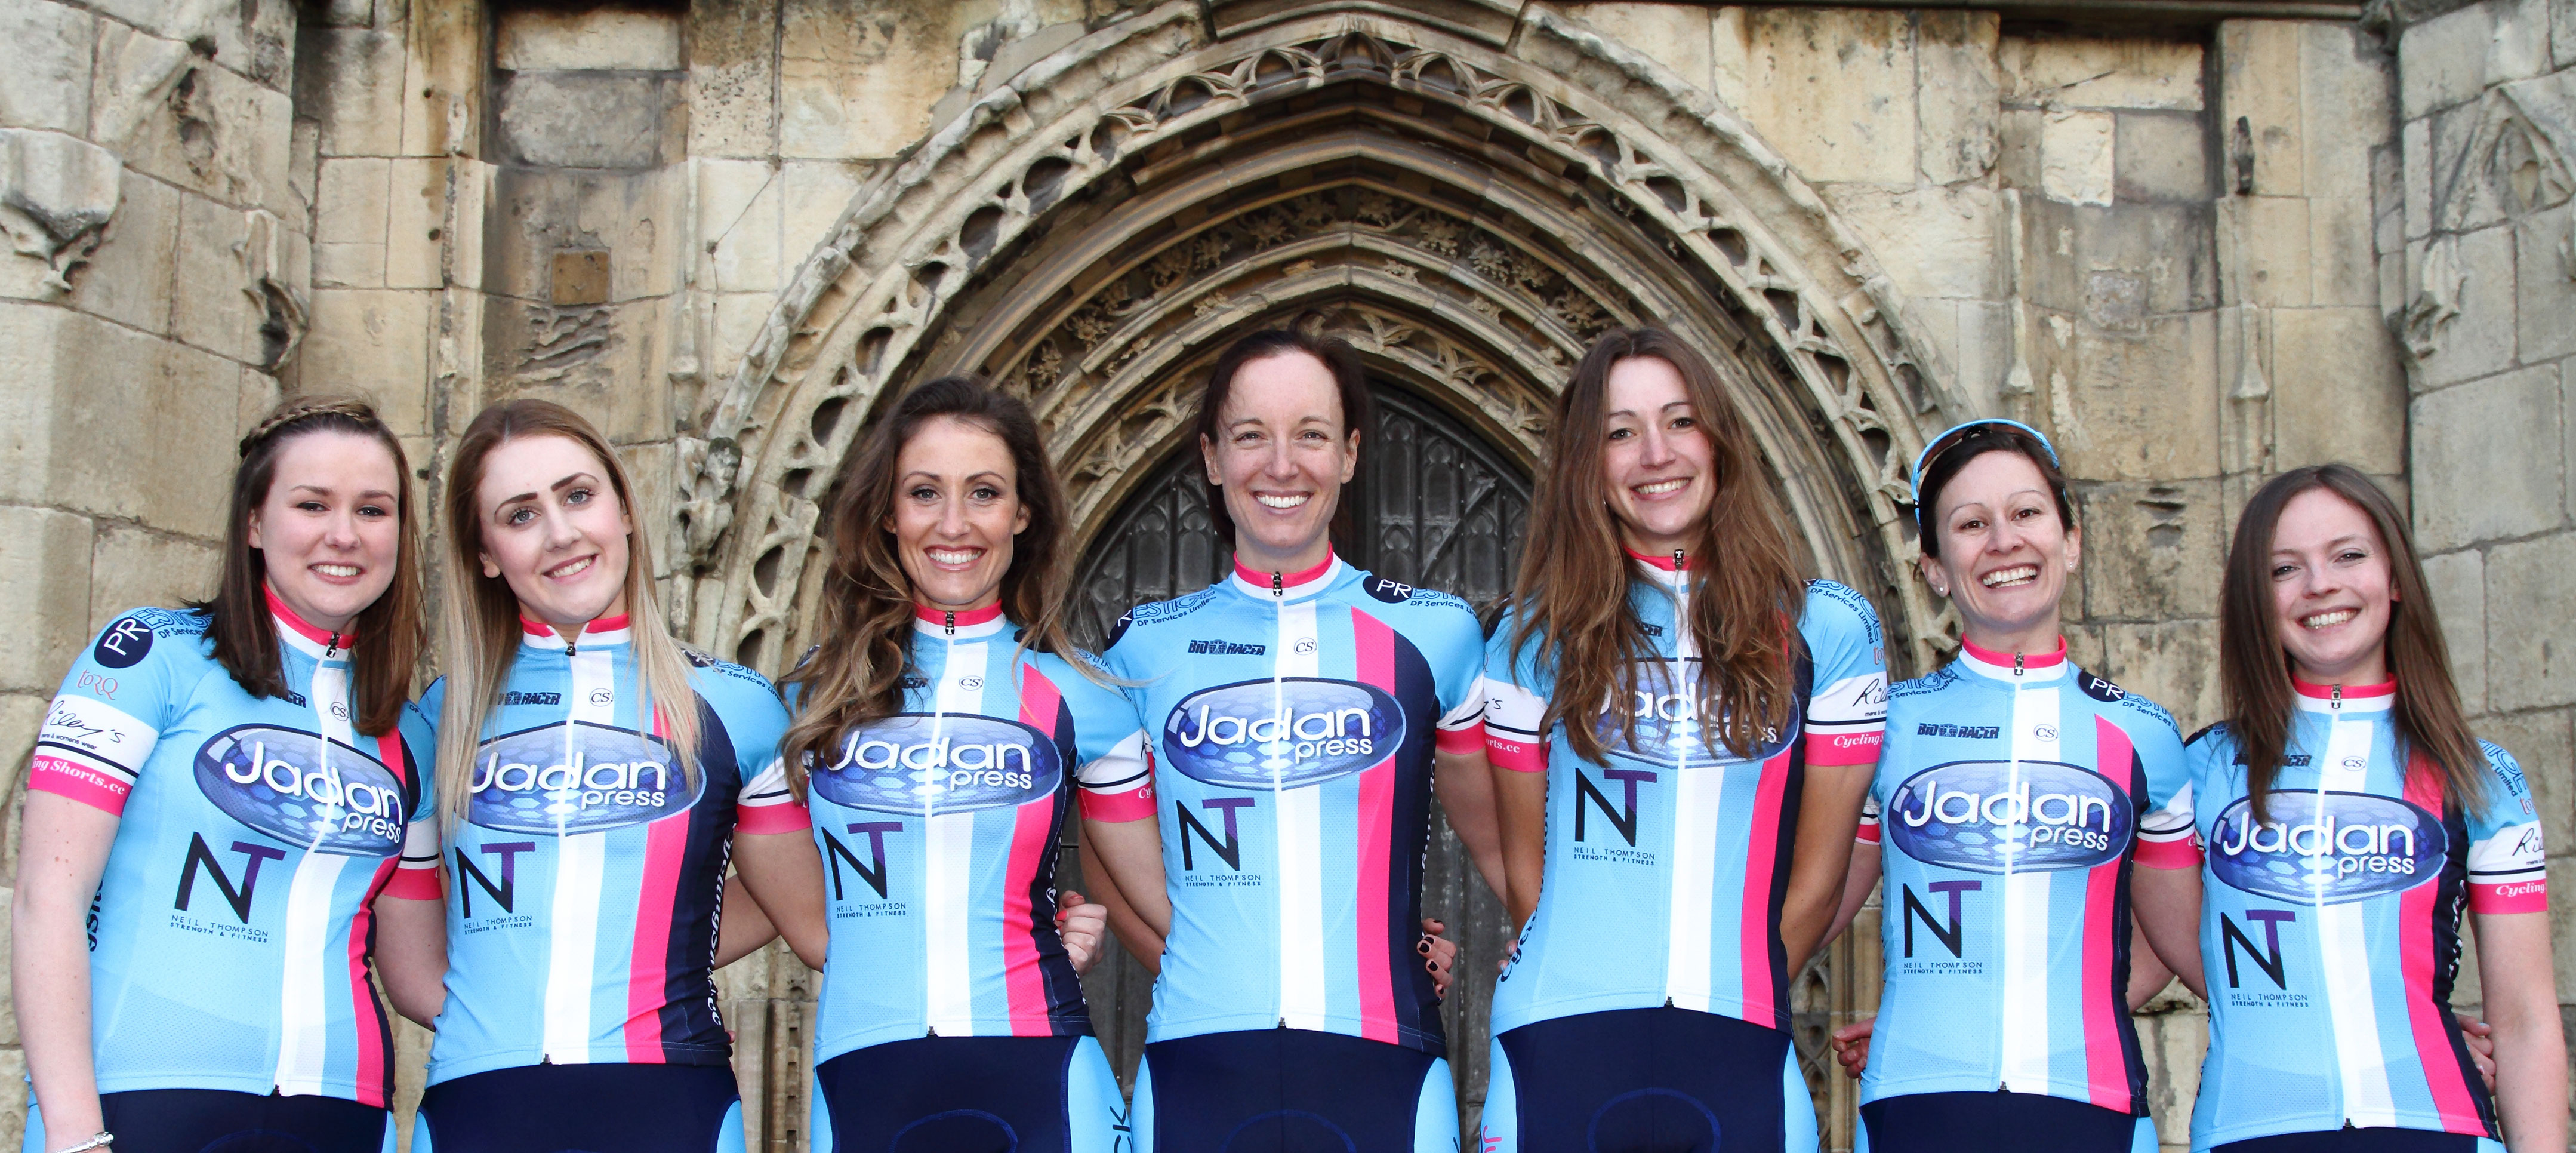
Saturday saw the launch of a new women’s cycling team – Team Jadan, hoping to change the image and progression of how women are involved in road racing. Team Jadan had its official presentation in the historic East Yorkshire town of Beverley at the eponymously named Beverley Arms Hotel.
As you may or may not know the Cycling Shorts collective has taken it’s first foray into cycling team sponsorship. We are very proud to announce our Official sponsorship of the new women’s Cycling Team – Team Jadan.
When I met the women on the team I knew they had the right attitude and mindset that I like to see in sportswomen. Cycling Shorts had to be involved!
I’m really impressed with the team’s attitude towards promoting women’s racing to all levels of riders. They are a great group of strong focused women. The team are out to prove you can have a family, career and study but still be part of a structured cycling team. As we all know the cycling world is male dominated and it’s a place where women are still not given equal standing, it needs these ladies to shake it up a bit from the grassroots!
I should also point out we have a vested interest because our Sub-Editor (and women’s cycling game changer) Heather Bamforth will be one of the team’s key riders this season. So no pressure Heather!
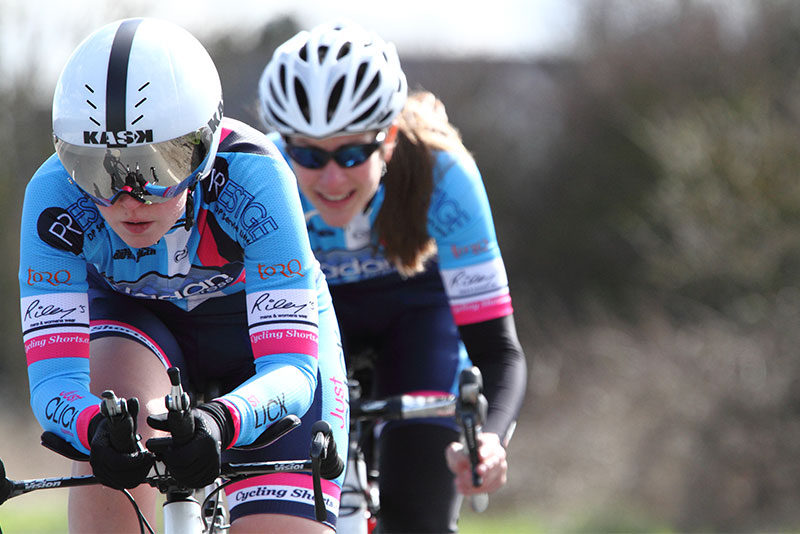
AnnaBel Sill & Frankie White – Hull Thursday 2-Up TT – ©TeamJadan / chrismaher.co.uk
Team Jadan is the brainchild of Victoria Hood who believes that the perception of what women of all levels can achieve in cycle road racing needs to be changed.
The concept behind the team is to provide a stepping stone for women to progress through the racing categories, keeping the experience friendly and supportive. The goal of the team is to break down the barriers for non-elite riders and to prove that road racing is accessible for women and that they have other options than just breeze rides and charity events if they want to gain more experience.
This year’s team is made up of a variety of levels of experience, all very strong cyclists in their own right, but the riders have also been selected for their attitude and because they are good ambassadors and role models for women’s road cycling. Team Jadan are here to prove you can have a full time job and family life as well as competing at a high level in what is a tough competitive sport.
The team will play a key role in the new Yorkshire Women’s Road Race Series (promoted by Victoria Hood) and the successful CDNW RR League (promoted by Team Jadan rider Heather Bamforth), both of which exist to provide a springboard for women’s cycling talent without the intimidating atmosphere of some of the traditional events on the race calendar.

Victoria Hood & Pam Wainman – ©Team Jadan / chrismaher.co.uk
When Victoria was looking for sponsors she chose the more continental style of sponsorship by including local businesses as well as international sports brands. The principal sponsor is Jadan Press, a Hull-based digital printers. The owner Pam Wainman was approached by Victoria and the two clicked immediately. Pam’s mother was a keen cyclist in the 1950’s and she sadly passed away just before Pam and Victoria met. When Pam heard Victoria’s plans for a women’s cycling team to encourage development of riders she decided she had to be part of it, “I know my mum would have been proud of the girls”.
The Sports brands on board are:
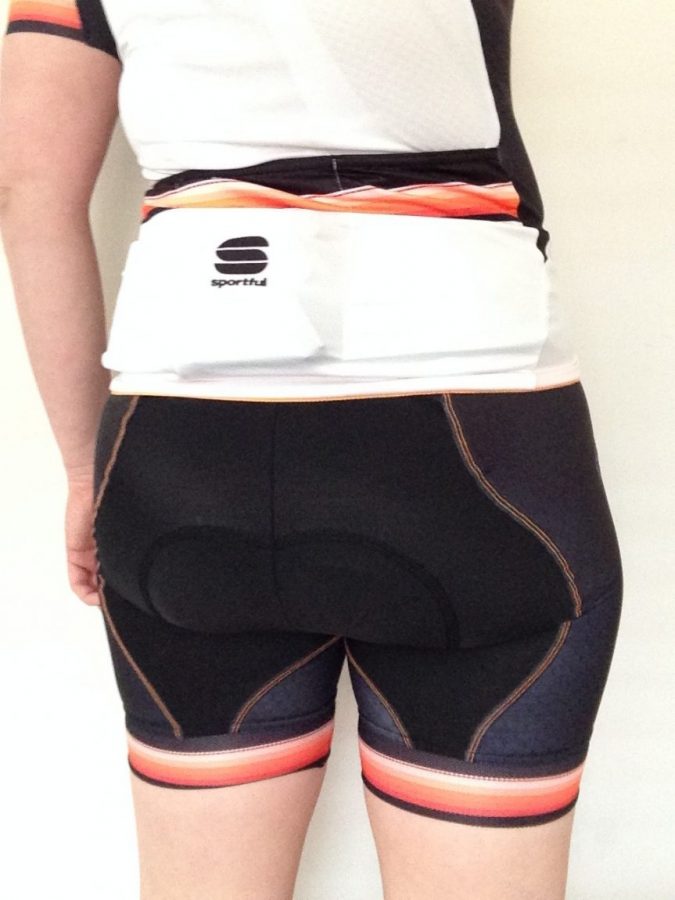
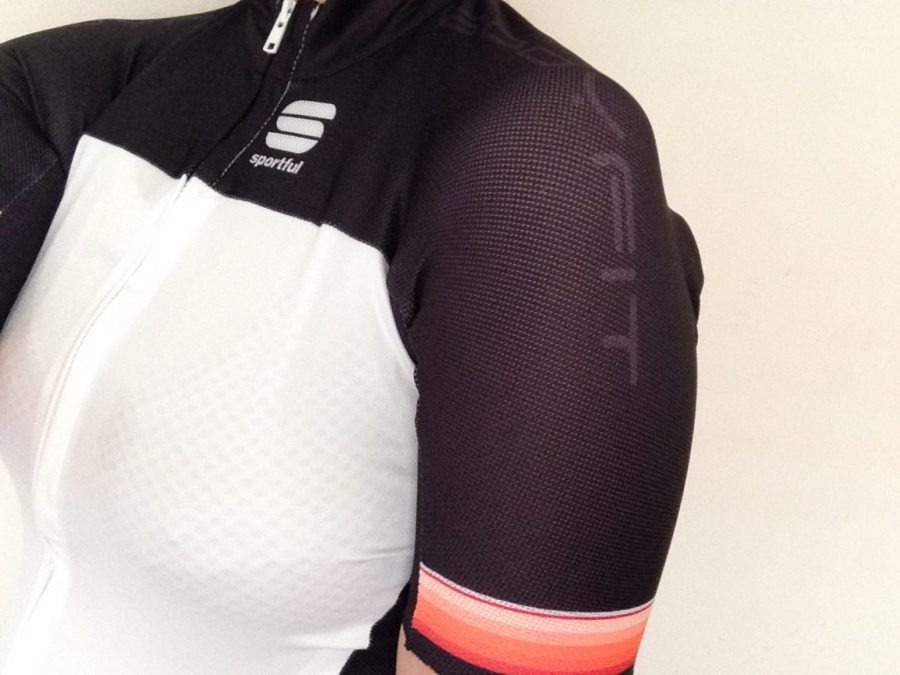
Bioracer UK who provide the women’s team kit.
Cycling Shorts an online cycling magazine who are providing the team’s website and PR.
Torq Fitness provides the team with performance nutrition products.
Vankru Cycling have fitted the team’s bikes.
Cycling Photographer Chris Maher who is the team’s official photographer.
Yorkshire Sponsors:
Jadan Press – Printers.
Neil Thompson Strength & Fitness a personal Trainer – Neil wants to promote strength training for women as it helps fight off osteoporosis.
Riley’s – a designer clothes retailer in Beverley.
Prestige – an East Yorkshire company specialising in damp proofing, fire and flood restoration.
Hugh Rice Jewellers – A Jewellery retailer with stores across the North of England.
The team aims to give back to its sponsors too. The team will all write about their training and racing experiences during the season. Through the www.TeamJadan.com website, sponsors are also encouraged to share their latest news.
The team is packed with personality, with different skills and backgrounds; A-level students, trainee teachers, mums and career women. They are out to prove that women can be involved in cycling with the same level of commitment and professionalism as their male counterparts, organising themselves as a dedicated competitive team with quality sponsors.
 Meet the team:
Victoria Hood – Team Captain – East Yorkshire
Victoria is a qualified ride leader and an NSI cycle instructor.
“The team I have is amazing they are all really strong riders but the important thing to me was that they had to be friendly and approachable, cycling is tough but it doesn’t mean you can’t have fun at the same time as racing. I want to promote women’s cycling, make it more accessible and help to bring more girls into the sport.”
 Heather Bamforth – Manchester
Heather has over 20 years’ experience of cycling, and has raced at both national and international level on the road in the past. A qualified cycling coach, Heather has proved to be one of the key people in bringing about a change to women’s competitive cycling by making it appealing to all levels of female cyclist.
“Victoria asked me to join the team as she wanted to set up a similar level of racing in Yorkshire to what I helped to instigate in the North West. 2014 sees the inaugural Yorkshire Women’s Road Race Series which I hope will prove to be as successful as the North West races. I am looking forward to being part of the team and we have a beautiful kit from Bioracer, which definitely helps us look the part!”
 Olivia Tomlinson – East Yorkshire
Olivia is the youngest member of the team and is in her first year as a senior rider. Olivia had some great results last season and is looking to build on her success last year.
“I have been riding since I was 14 – I took part in a local club’s time trials and joined in on their Sunday rides. When I was 16 I began to enter races and really enjoyed taking part in the events. For this year’s season I am looking forward to racing in a women s team, I’m hoping to progress and learn from the other more experienced team members”.
 Annabel Sill – Hertfordshire
Annabel has been riding for 6 years. “Cycling and racing has been a big part of my life since university, and my current housemates put up with me having four bikes in the house and a turbo in the corner of the kitchen. I’ve been time trialling for five years, and started doing a mix of crits, road races and TTs in the 2013 season – and that’s how I met Victoria, she asked if I would like to join the team. I’m keen to promote women’s racing and I’m currently doing a British Cycling Level 2 Coaching course to help bring on youth and junior girls at my cycling club Welwyn Wheelers. I’m really looking forward to building on my strengths, and being able to race with and support the other girls on the team this year!”
 Lauren Brown – Carlisle
Lauren is a feisty rider, who has a number of local victories under her belt over the last few seasons.
“Having raced for Abergavenny WCT last season, I’m looking forward to racing with the girls in National Series events and the CDNW women’s road race league and the new Yorkshire road race league. I’m from a sprint and track background then two years ago I switched to road. I’m a Level 2 British Cycling Coach and I help little kids improve their skills… well I certainly hope I do!”
 Frankie White – Manchester
“I’m very much looking forward to racing in the UK and beyond with this lovely group of ladies. We have a great mix of characters on this team, each inspiring me to work hard and develop as a rider. I really enjoyed our first training camp in FebruaryI much prefer the long races, 3 hours is good for me, I’m the complete opposite to Lauren, she’s really good at 1 hour long crits. I find it’s not nearly enough for my style of racing, I love the endurance.”
 Sam Thoy – Lincolnshire
Sam has been racing cyclocross through the winter, with 5 wins under her belt so far – a latecomer to cycling but with a fell running background she’s a very strong athlete.
Sam said “I am looking forward to this year, with our team doing some proper damage at the national team series events. I also fancy trying the round town circuit races and there is a race up Alpe d’Huez that I must do! I just love biking and racing, why did I not discover it earlier!”
by Jack Holroyde | Mar 5, 2014

Dirty Bicycle Chain Image by hlaricca
For those of you that don’t know, when I’m not praying or meditating on the meaning and worth of pain, I work in a bike shop. Selling, maintaining, riding.
One of the questions I get asked a lot in the shop is ‘what is the right lube to use on a bike?’
There are as many types of lube as there are applications for it, and with good reason. Most of the time people are using the wrong lube for the wrong application and directly or indirectly bugger everything up.
Who hasn’t seen a chain laden with sludge, with slop dripping off the jockey wheels and cassette?
That’s not lube – it’s dirt. Dirt that’s stuck to the lube.
Who hasn’t seen a completely rusted chain, or a headset so gone that there’s rust dribbling down the fork? That’s caused by water ingress past the grease.
All of these parts have been lubed, but what has gone wrong is either the quantity, the quality or the regularity of the greasing has gone wrong.
I guess I’m going to go over parts of the bike, starting from the inside out and try and explain what each part does, what the function of the grease is in that scenario, and therefore how much lube, and what thickness of lube to use.
Before we start, we need to talk about assembly grease. Most parts on a bike that require a screw thread are made of aluminium alloy. One of the important things to note about aluminium is that similar to iron, when exposed to oxygen it forms an oxide, which unsurprisingly is called aluminium oxide. When alloy and alloy screw or press into each other, in time the separate pieces oxidise, much like rust, and ‘dry weld’ themselves together. Cue new chainset when someone hasn’t put a dash of grease on the pedal screws before fitting them. Cue new frameset when someone hasn’t greased the bottom bracket threads before tightening the cups.
Grease provides a barrier between the alloys, stopping them seizing. It also serves to keep air (and therefore oxygen) and water away from the greased part.
Assembly grease is cheap, and you don’t need much, but whenever you are fitting two pieces of alloy together, you *must* use it. Lecture over.
There is also carbon paste, for putting carbon things together. This contains tiny particles of carbon, which act like a grit and bite into the parts to stop them slipping. If you’re putting a carbon seat post into an alloy or carbon frame, be sure to use carbon paste. Else your seatpost will slip and you’ll find your groin slammed into the top tube. And that’s not pleasant. I can testify.
So, bearings and internal greasing:
First up, my go-to lube for internals and bearings is Finish line Teflon Grease. It comes in a tube to which you can attach a Finish Line grease gun, which makes greasing hubs and bearing internals an absolute doddle. It also works great as an assembly grease. When I say grease, I mean this stuff unless I specify otherwise. The grease is about a fiver, the gun about 20 quid, but should last forever. This stuff shouldn’t be used on rubber seals though. The lithium in it eats rubber. If you’ve got a part with a rubber seal, I’d recommend White Lightning Crystal Grease.
Bottom brackets, like the hubs, are an axle spinning in a ring of bearings. The BB bearings come in three main types – cartridge, threaded cups and press fit sealed bearings.
In a cartridge system (such as Square taper, Octalink, PowerSpline), the axle and bearings are contained in a single unit. The axle sticks out either side to provide space for the cranks to be fastened to. To get to the bearing we must (once the BB is removed) peel back the weather seals and apply the lube directly onto the bearings which are just inside the shell of the BB.
As they’re so close to the surface, and the BB gets a regular dosing of road spray, the lube we use needs to concentrate on keeping water and other solvents out, keeping the bearing running smooth and must be thick enough to stick around for the long term. Even the most die hard of us won’t strip the seals off a BB more than once a year – else we’ll knacker them through our over zealous intrusions.
To perfectly fulfil this purpose must be *thick*. Wayne Rooney thick. Almost solid.
So on your cartridge BB and hub internals, you want to have the thickest, most water resistant grease you can get your paws on. I tend to use lithium grease because it’s thickish, water resistant and messy, and a BB service isn’t a BB service without your clothing being covered in greasy smears.
Threaded cups are a lot more simple. They’re sealed, you can’t get in. When you bugger them because you were careless with where you were spraying degreaser when cleaning your drive train, you chuck them out and replace them. Good thing is they aren’t expensive. Bad thing is, you really need to be taking your bike to a shop to get it changed. However, assuming you have a Hollowtech II tool, a torque wrench and a work stand, you just put a bit of assembly grease on the threads and whack it in.
Press fit bearings (BB30, BB90, PF30 etc) are when the sealed bearing themselves are just pressed into the frame with no cups, either by hand or with a pressing tool. The benefit is that the BB shell (the tube in the frame through which the cranks pass) can be much wider, and therefore stiffer. The bearings are sealed, so once again the internals are ‘fire and forget’. For some ungodly reason, some manufacturers are now fitting these into alloy frames (as if they need improved stiffness) which means that the metal shell and the metal bearing rub against one another causing the whole frame to creak with every stroke. The trick here, to stop the creaking, is not to buy an alloy frame with a BB30. Or a carbon frame with an alloy BB shell and a BB30. Seriously. A thick pasting of grease, applied regularly to the inside of the shell, might help the situation if you’ve already bought said Boardman/Cannondale.
Headsets also come in different types, notably integral (often 1 1/8″, sometimes tapered to 1 1/2″ sealed bearings pushed directly into the frame) or external (usually 1″ cups screwed onto a threaded fork). For integral bearings, just apply a thin coat of grease to the inside of the shell and gently press in with a headset press. For external cups, these should be cleaned and repacked with grease annually, similar to hubs. Lithium grease, again, works wonders.
The only other internal part that springs to mind is the freehub body. There may or may not be another guide on servicing these, but in here we need to ensure that hub, pawls and springs can all operate smoothly. We *have* to have a clean, dirt free environment. I tend to use Shimano Mineral oil in here, because it’s so thin, but then again I service my freehub every couple of months. If you’re not that keen, a wet chain lube or a thin coat of White Lightening Crystal grease can work. Under no circumstances should any thick grease be applied in here. Stuff like ‘tenacious’ chain lube and lithium grease can gum up the whole sensitive apparatus and stick pawls in ratchets/stop star ratchets disengaging from the hub body. It has to be thin. And it HAS to be clean. Remove all the bearings, degrease thoroughly [with a degreaser naturally]. Clean with a clean cloth, remove any remaining degreaser, dry either with cool air or time (don’t use a hairdryer, you risk warping parts), and put a droplet of mineral oil on each pawl. Massage it in to ensure good coverage. Put a couple of drops on the ratchet inside the freehub body, then slip it together. Give it a spin until you can hear each pawl engagement as a distinct ‘click’. If you can’t, take it apart, clean it better, and use decent lube like I just told you to, you numpty!
Cables need lube when putting on. An oil based thin lube, like wet chain lube or mineral oil can smooth cable actuation and keep the outers from rusting. Just put a small amount on when fitting, don’t worry about redoing it. For those of you with high end groupsets, consider a polymer cable system. Shimano’s coated Dura Ace cableset is pretty damn good.
Now, lets talk about Chain lubing:

Use Lube image by Angela Richardson
Whatever you’re doing, chances are you’re doing it wrong. I had one gentleman storm out of my shop giving us all abuse because we suggested that WD40 was not a suitable lube for his chain. He’s been doing it wrong for 35 years, apparently, and got quite attached to doing it wrong, and was enraged when a qualified mechanic thought he should know that there was a better way.
So, if you’re reading this, don’t take offence. Just know that there are a lot of lubes for a lot of riding styles and conditions – and while there are compromises, GT85 and WD40 are not suitable lubes under any conditions.
So as we’re here, lets start with WD40. ‘Water Displacer 40’ was the 40th iteration of it’s inventors (you guessed it) Water displacement formula. In order to push water out of tight spots and prevent it’s reentry, WD40 is very thin and has a deep penetrating effect. It’s highly flammable and a volatile solvent. This thin, solvent property provides its most useful cycle related application – cleaning.
While to remove thick, encrusted dirt (like on old hub bearings) a stronger degreaser is needed, for chains and other minor degreasing jobs WD40/GT85 works a treat. Spray it on a cloth, then grab hold of your chain and watch the gunk wipe away. GT85 is basically the same stuff, but it leaves a teflon coating which does serve to provide a long term lube for things that don’t move a huge amount. Like door hinges. And drawers. That is the limit of it’s usefulness. Is you bike chain a water filled crevice, a door hinge, or a drawer? No? Then don’t use a solvent intended for that, then.
WD40 also serves to help us unseize stuck parts. You know, when you didn’t use assembly grease, like I told you to.
So what lube should you be using?
Wet: Oil based, Wet lube is ideal for wet and muddy conditions where a water based lube would get washed away.
Dry: This is kind of like a talcum powder suspended in solvent. It penetrates deep into the chain, then the solvent evaporates, leaving a layer of slippery solid behind. Ideal for long dry rides or sandy/dusty conditions where wet lube would be turned into a sand paste.
Ceramic: These can be wet or dry, ceramic lube has nanoparticles that leave a protective coating on the chain, enhancing it’s life and making shifting smoother and quieter. It is sometimes branded as ‘Stealth’ lube.
Chain lube usually comes in two containers: a spray can and a bottle.
Spraying lube around tends to cock up brake surfaces, pads, internal greases etc, so stay clear. Buy bottled lube or not at all.
When applying lube to the chain, we don’t just throw it on. To do so would likely overlube, meaning that road debris is more likely to stick to it, and any dirt already on the chain is going to get carried into the rollers and booger them pretty quick. First grab that WD40 that you’ll never need and spray it liberally onto a bit of cloth. Grab hold of the bottom of the chain with the cloth and turn the crank backwards, pulling the chain through the cloth. This should really be done after every wet ride, but compromises exist for a reason. I don’t even bother with my Ultegra 11-speed chain. Do it before every lubing though. While you’re there, just touch the cloth to the jockey wheels of the rear dérailleur as the chain is moving to clean the gunk off there.
When the chain is clean(ish), apply the bottle of lube to the bottom of the chain, just in front of the lower jockey wheel and turn the crank backwards. You want a thin line of lube to form down the centre of the chain – not too much. Turn the crank backwards for a minute or so after you’ve lubed it – this helps the lube sink into the rollers – then wipe of the excess with your rag – again grabbing the bottom of the chain and running the crank back.
Do this every couple of weeks or every 200 miles, whichever is sooner.
Every 600 miles or so, take the chain off and clean it thoroughly. Follow a guide from Sheldon Brown or something on Youtube on how to do this. Dry and lube thoroughly afterwards.
What not to lube:
Tyres. Yes, people can be that silly.
Brake discs. Seems obvious, but you’d be surprise how many people try to resolve a squealing disc brake with a touch of lube. The squealing is caused by glazed pads leading to a lack of friction, not by too much friction. If you have lubed the disc, you’ll need new rotors and new pads.
So there you have it. The right grease, in the right place, in the right amount. Simples.
by Darren Collard | Feb 5, 2014
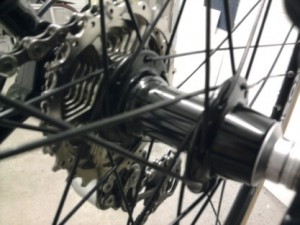
Review: Purple Harry Bike Floss
Keeping your bike clean is important for making sure that it keeps running smoothly, reducing wear and for finding any problems before they become big and expensive. Also, if you are like me, there is a sense of satisfaction in making sure your precious steed remains looking new and shiny.
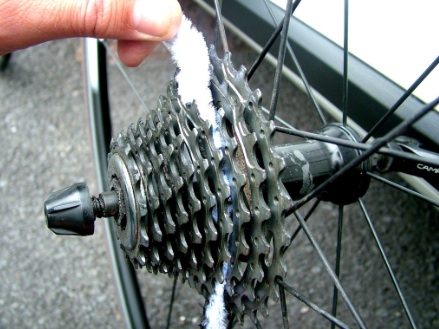
The Bike Floss range is designed to seek out all those little places where dirt, grime and oily abrasive paste build up. There is a choice of three grades:
 Large bristle. Less abrasive and softer than the medium, but not to be used on Carbon fibre components. Use on derailleur’s and the drivetrain.
Large fleece. Ideal for polishing/final buffing, and for all Carbon fibre parts.
Medium bristle. The most abrasive floss, perfect for cassette cleaning.
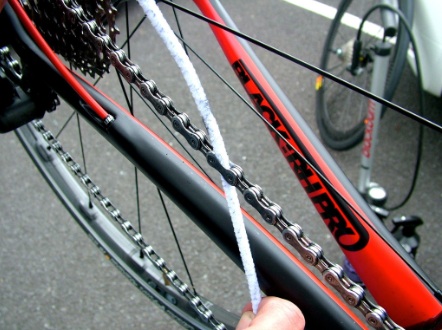
As you can see in the picture, the purple flecks are stiffer more abrasive bristles, while the white ones hold onto the dirt.
There are five pieces in each re-sealable packet, with a recommendation on their use printed on the label.
Be careful when handling the medium bristle version, they are prickly; they caught me unawares even before I had opened the packet! The short stiff bristles had punctured through the bag and I originally thought that perhaps some of the wire core was broken and poking out, but realised that the purple bristles that cover the whole length were to blame. From then on I wore gloves while using them.
How to use them: As their name suggests, you use them in a flossing action, I tested them on my cassette and chain by following the guidelines provided. Purple Harry has produced some helpful videos on their YouTube channel showing how to use them too. http://www.youtube.com/purpleharrybikestuff
 Firstly I applied some degreaser and left it to soak into the dried oil and grime before getting to work with the medium bristle floss.
I found it very easy to quickly work my way around the sprockets, moving the floss down to each space in turn, starting at the back one to the front. The thickness of the floss is made to fit snuggly into the sprocket spacing, meaning that you are cleaning both sides at once and the bristles are long enough to clean all the cut-outs on each sprocket too, I was expecting to have to finish off these and the top faces of each one separately, but it was not necessary.
I then used the large fleece bike floss to mop up the remaining degreaser and buffed up the sprockets back to their shiny silver, it was at this stage that I learnt that I had sprayed too much degreaser onto the sprockets because the fleece soon became saturated, alternatively I could have washed off the degreaser with clean water before using the fleece to dry it. The next time I will use less spray and this will make the job much faster.
The results: See my before and after pictures below:

Although it is unclear from my poor photos’ the cassette and chain has had a thorough clean, with every visible place where dirt could hide now a pleasing shiny surface instead.
To achieve this result I had only used two of the floss sticks, and don’t think that once used they should be thrown away – Purple Harry say that they can be cleaned with either degreaser or white spirit and used several times. I left mine soaking in a bath of degreaser overnight, and they will be put to good use on the chain and sprockets again. So if for instance, they can be used five times each, that is twenty-five washes per packet – not bad for the price.
Improvements that I would like to see; Due to the unexpected sharpness of the bristles in the medium floss stick, I would prefer it if the packaging was improved to protect your hands. I suggest that a clear plastic vacuum formed container with a clip-shut lid would work well and it could also be used as a bath to leave them soaking after use.
Also, as they are sold in packets of five items per bag, to clean and dry the cassette properly you will need to buy at least two packets (one medium bristle and one large fleece), a nice option would be to have available a prepared pack that contained all that you need to clean your drivetrain a few times; a couple of medium bristle floss sticks, a couple large fleece sticks, perhaps one large bristle floss and a small bottle of Purple Harry degreaser.
Final Verdict: These products are easy to use and do their job well, my drivetrain has never been so clean. They are not too fiddly to use and will make your bike in ‘showroom’ condition, great for adding that extra smart appearance by ridding those little crevices of dirt.
Be warned! Once you start looking for those little places where dirt calls home, the more places you will find need cleaning. For those inclined, it could become a little obsessive and you’ll spend more time with the Purple Harry Bike Floss than riding!

Review: Purple Harry Bike Floss.
(£3.99 per packet of 5)
Available from all good cycling retailers and direct from Purple Harry’s website.
Click here to visit Purple Harry’s online shop www.purpleharry.co.uk
Effectiveness & ease of use: 95%
Value for money: 85%
Overall 90%
 Simply pour a small amount onto a clean soft cloth of your choice, apply to the bike in a circular motion and then wait for at least 5 minutes for the polish to dry, then buff off to reveal a gleaming silky smooth surface. Of course, as with any polish, avoid getting any on the braking surfaces and it’s not recommended for use on the saddle or brake levers!