by Darren Collard | Apr 11, 2014
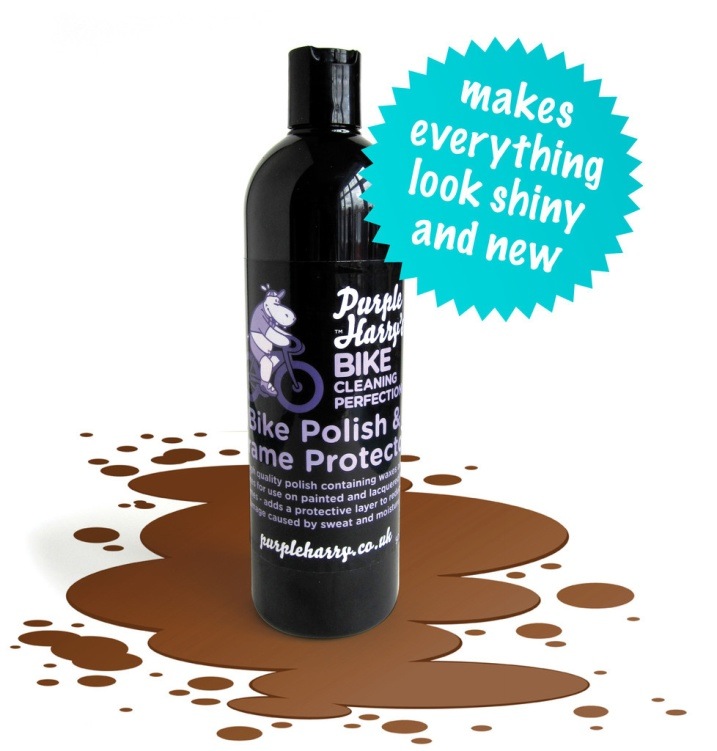
 Following my high scoring reviews of the Bike Floss (90%) and the Bike Polish & Frame Protector (100%) from UK Company Purple Harry, I now turn to their Wash & Polish Mitt.
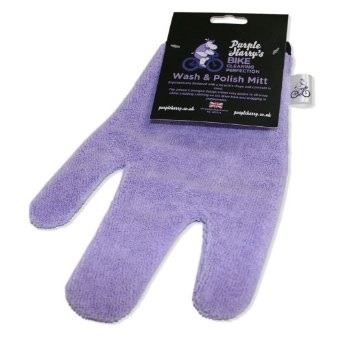
It is made from good quality microfibre material and shaped into a three fingered ‘lobster claw’ glove, which according to their website “has been ergonomically designed with the bike’s shape and contours in mind – allowing access to difficult areas whilst avoiding catching on the drive train and snagging in components”.
For this review I will be comparing this mitt with my usual cleaning materials; standard square shaped microfibre cloths bought from my local Pound store!
The Mitt costs at least SIX times more than the cloths I have been using for many years for cleaning and polishing duties, but is it worth the extra expense?
I hit a problem with the Mitt straight away; I couldn’t get it onto my hand.
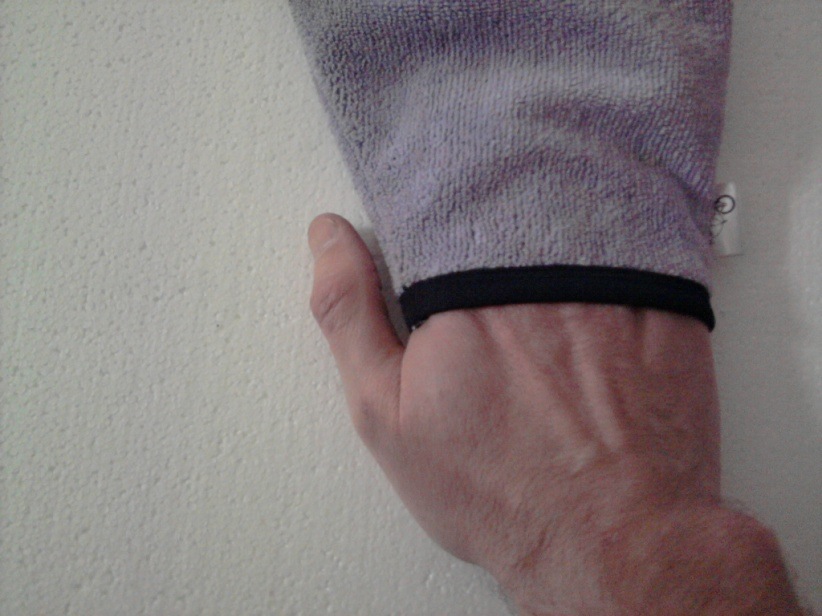
My hands are not excessively large, but I struggled for a while before having to resort to using scissors to cut the black narrow cuff stitched into the Mitt to allow my hand in. Due to the Lobster claw shape your second and third fingers are forced apart, which felt uncomfortable to start with, but overtime became less troublesome.
Also while working on the bike, because you have two pairs of fingers held together, it restricts how well you can get into those small little gaps and crevices that need to be reached while cleaning or polishing. My natural instinct is to use just the finger-tip of my index finger to get to those more intricate areas, something you can’t do very successfully with this Mitt as the combined width of two fingers stops you reaching as far as you would like.
Also with my normal square cloth I can easily reach every corner on the frame by using it in a flossing action by just pulling one corner into the tight spot, for example cleaning between the rear wheel and chain stays, the gap is far too narrow to get my finger in between.
 Another disadvantage of using the Mitt is that the actual area of material that you can use for cleaning/polishing is very limited; meaning that it quickly becomes too dirty or clogged. You have the whole Mitt but in reality can only effectively use the finger tips for finer work and the length of your fingers for working on the more accessible areas.
To use the other side you will need to take the Mitt off and put it on your other hand. This means that it might become too dirty to finish the job, you will have to wash it after every use or you will need to buy a couple more!
My way of working is that I currently have several 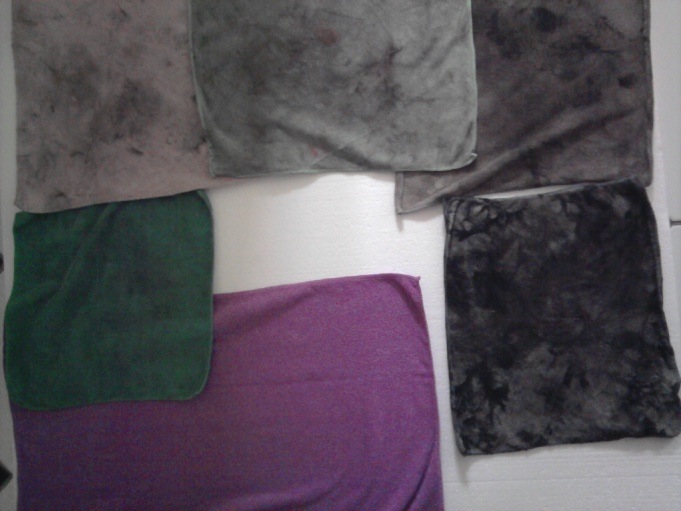 microfibre cloths in use, each one is given a different task depending on how dirty it is; brand new ones are used for dusting and polishing only, but once they become clogged or a little dirty they then move onto drying or light cleaning duties and the previous one used for this purpose is ‘downgraded’ to more dirty tasks and so on until the very last one is used exclusively for chain cleaning work – and once this is oil soaked it is binned and another trip to the Pound shop is made to buy a fresh one to start the process again.
These cloths can be washed too, but as they cost as little as 99p for three it is not worth the effort. As they are square shaped you can use every inch of the cloth, both sides included, and by wrapping your index finger in the cloth with the remainder held in the palm of your hand you can reach those smaller awkward places with a clean patch of fabric every time unlike the Mitt.
From the picture above; in the bottom left is a new cloth, and each one in a clockwise direction becomes progressively dirtier.
 So, as you can gather from my comments, I would not recommend that you pay £5.99 for this Mitt, instead buy six standard cloths and use a rotation system similar to mine, you will get much more value for money and they’ll do a better job too!
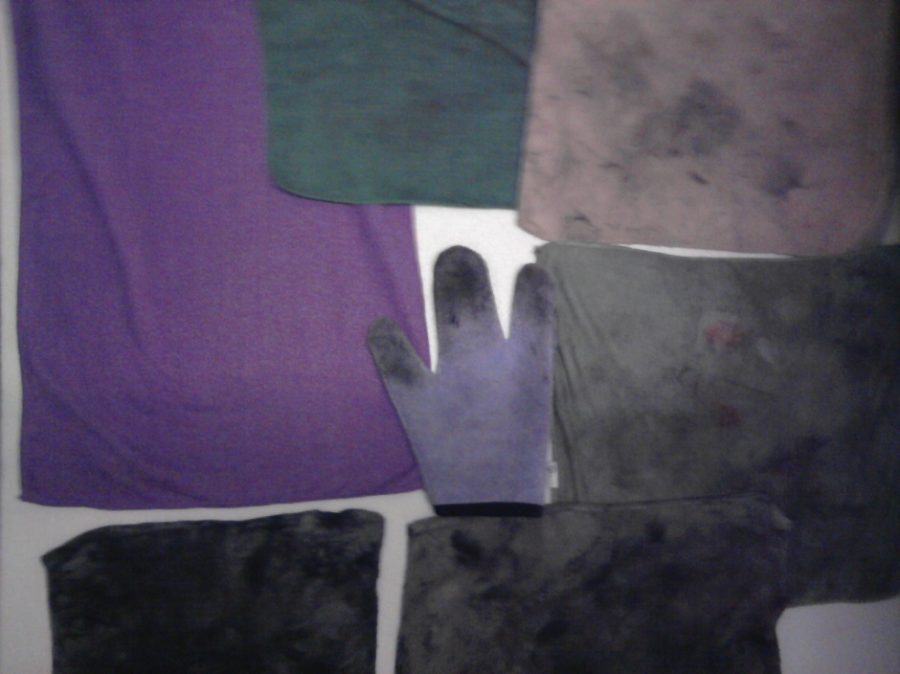
Left, is a comparison of cleaning area between the Mitt and cloths for the same price. Unfortunately I am awarding my lowest score so far, all the effort that has gone into cutting out the shape, stitching it together and attention to detail like adding the cuff and Purple Harry label has not only cost a lot to do, it has also severely restricted its usefulness, which is reflected in my score below:
Sorry to the Guys at Purple Harry, I can only give the Mitt a paltry score of 17%.

by Darren Collard | Apr 4, 2014
 With the constant rain that has become the norm here in the UK lately, it has become more important than ever to regularly clean your bike. This will not only reduce corrosion, but also limit the wear from those little bits of grit and muck that stick to the frame and components when cycling on wet roads.
The UK produced Purple Harry Bike Polish will not only leave your bike sparkling, it also leaves a protective layer of waxes and silicones, adding an extra barrier to your paintwork which will make it easier to clean in the future too!
 Simply pour a small amount onto a clean soft cloth of your choice, apply to the bike in a circular motion and then wait for at least 5 minutes for the polish to dry, then buff off to reveal a gleaming silky smooth surface. Of course, as with any polish, avoid getting any on the braking surfaces and it’s not recommended for use on the saddle or brake levers!
In the past I have only used the same polish as I use on my car (Turtle Wax), and have been pleased with the results, but I was very impressed with the Purple Harry Polish.
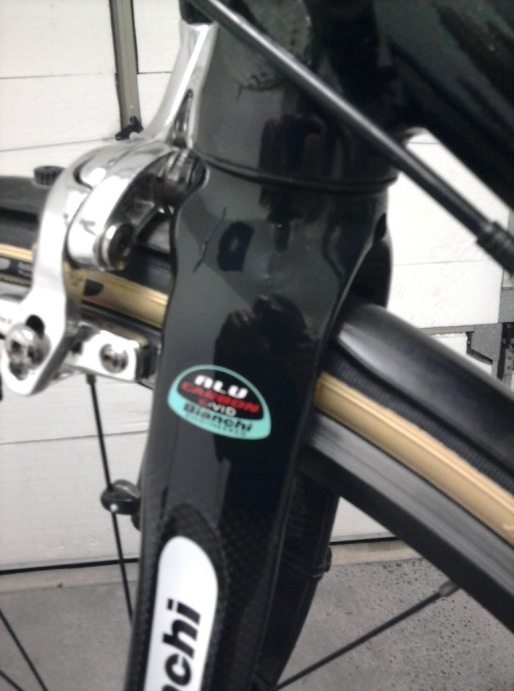
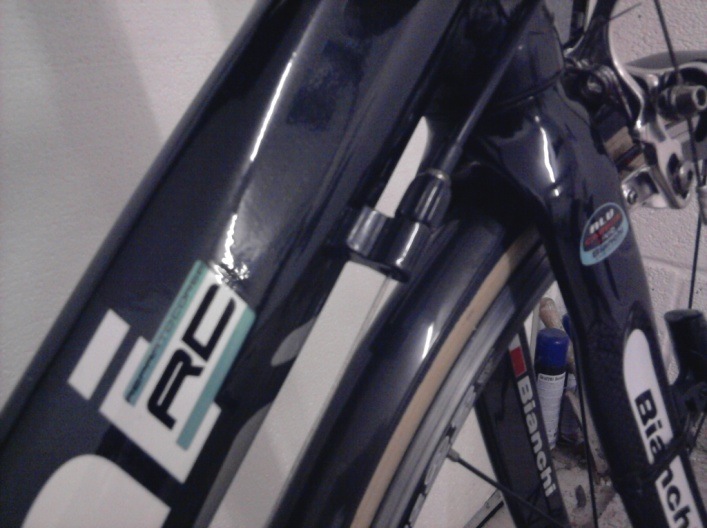
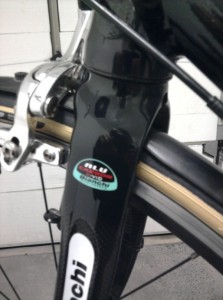
The crown on my carbon forks had minute scratches that always caught my eye in the past, but now they are gone, to be replaced by a nice deep black mirror like shine!
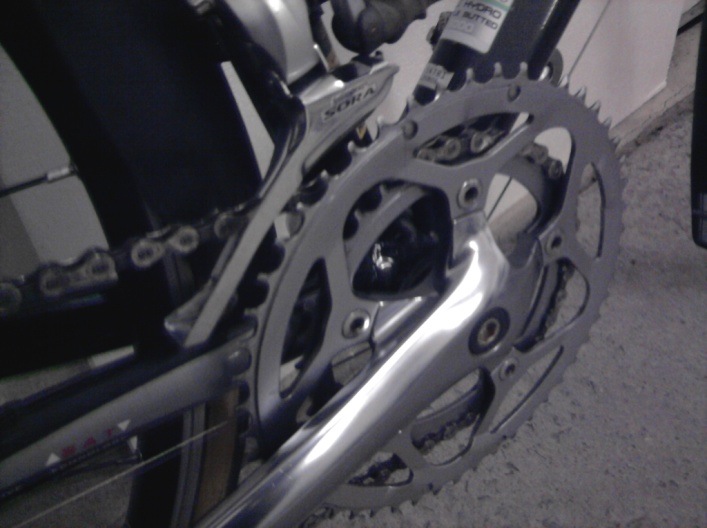
I also got a good finish when applying the polish to the painted Aluminium frame, carbon forks, Aluminium chainset and even plastic mudguards, so it can be used on most bike surfaces (take extra care if polishing wheel rims not to make the braking surface super slippery!).
My bike has never looked so good, after using the Bike Floss sticks to clean the cassette and chain and now protecting every suitable surface with the Bike Polish, it is almost in ‘as new’ condition. This is impressive; when you consider that it is a 2008 bike that I bought secondhand, which gets used nearly every day, for either a weekend ride or my commute to work.
It is difficult to say how often you should apply the polish, I guess it depends on the weather conditions and how often the bike gets washed, and obviously you wouldn’t use it every time you clean the bike. Perhaps 3 to 4 times a year seems to me to be a sensible figure. The bottle should therefore last for years (Unless, because of the fantastic results, you go on to use it on your car, caravan, or boat too!).
 I really can’t find any negatives; it just works better than anything else I have tried before.
So, a first from me, a score of 100% for Purple Harry Bike Polish!
by Jack Holroyde | Mar 5, 2014

Dirty Bicycle Chain Image by hlaricca
For those of you that don’t know, when I’m not praying or meditating on the meaning and worth of pain, I work in a bike shop. Selling, maintaining, riding.
One of the questions I get asked a lot in the shop is ‘what is the right lube to use on a bike?’
There are as many types of lube as there are applications for it, and with good reason. Most of the time people are using the wrong lube for the wrong application and directly or indirectly bugger everything up.
Who hasn’t seen a chain laden with sludge, with slop dripping off the jockey wheels and cassette?
That’s not lube – it’s dirt. Dirt that’s stuck to the lube.
Who hasn’t seen a completely rusted chain, or a headset so gone that there’s rust dribbling down the fork? That’s caused by water ingress past the grease.
All of these parts have been lubed, but what has gone wrong is either the quantity, the quality or the regularity of the greasing has gone wrong.
I guess I’m going to go over parts of the bike, starting from the inside out and try and explain what each part does, what the function of the grease is in that scenario, and therefore how much lube, and what thickness of lube to use.
Before we start, we need to talk about assembly grease. Most parts on a bike that require a screw thread are made of aluminium alloy. One of the important things to note about aluminium is that similar to iron, when exposed to oxygen it forms an oxide, which unsurprisingly is called aluminium oxide. When alloy and alloy screw or press into each other, in time the separate pieces oxidise, much like rust, and ‘dry weld’ themselves together. Cue new chainset when someone hasn’t put a dash of grease on the pedal screws before fitting them. Cue new frameset when someone hasn’t greased the bottom bracket threads before tightening the cups.
Grease provides a barrier between the alloys, stopping them seizing. It also serves to keep air (and therefore oxygen) and water away from the greased part.
Assembly grease is cheap, and you don’t need much, but whenever you are fitting two pieces of alloy together, you *must* use it. Lecture over.
There is also carbon paste, for putting carbon things together. This contains tiny particles of carbon, which act like a grit and bite into the parts to stop them slipping. If you’re putting a carbon seat post into an alloy or carbon frame, be sure to use carbon paste. Else your seatpost will slip and you’ll find your groin slammed into the top tube. And that’s not pleasant. I can testify.
So, bearings and internal greasing:
First up, my go-to lube for internals and bearings is Finish line Teflon Grease. It comes in a tube to which you can attach a Finish Line grease gun, which makes greasing hubs and bearing internals an absolute doddle. It also works great as an assembly grease. When I say grease, I mean this stuff unless I specify otherwise. The grease is about a fiver, the gun about 20 quid, but should last forever. This stuff shouldn’t be used on rubber seals though. The lithium in it eats rubber. If you’ve got a part with a rubber seal, I’d recommend White Lightning Crystal Grease.
Bottom brackets, like the hubs, are an axle spinning in a ring of bearings. The BB bearings come in three main types – cartridge, threaded cups and press fit sealed bearings.
In a cartridge system (such as Square taper, Octalink, PowerSpline), the axle and bearings are contained in a single unit. The axle sticks out either side to provide space for the cranks to be fastened to. To get to the bearing we must (once the BB is removed) peel back the weather seals and apply the lube directly onto the bearings which are just inside the shell of the BB.
As they’re so close to the surface, and the BB gets a regular dosing of road spray, the lube we use needs to concentrate on keeping water and other solvents out, keeping the bearing running smooth and must be thick enough to stick around for the long term. Even the most die hard of us won’t strip the seals off a BB more than once a year – else we’ll knacker them through our over zealous intrusions.
To perfectly fulfil this purpose must be *thick*. Wayne Rooney thick. Almost solid.
So on your cartridge BB and hub internals, you want to have the thickest, most water resistant grease you can get your paws on. I tend to use lithium grease because it’s thickish, water resistant and messy, and a BB service isn’t a BB service without your clothing being covered in greasy smears.
Threaded cups are a lot more simple. They’re sealed, you can’t get in. When you bugger them because you were careless with where you were spraying degreaser when cleaning your drive train, you chuck them out and replace them. Good thing is they aren’t expensive. Bad thing is, you really need to be taking your bike to a shop to get it changed. However, assuming you have a Hollowtech II tool, a torque wrench and a work stand, you just put a bit of assembly grease on the threads and whack it in.
Press fit bearings (BB30, BB90, PF30 etc) are when the sealed bearing themselves are just pressed into the frame with no cups, either by hand or with a pressing tool. The benefit is that the BB shell (the tube in the frame through which the cranks pass) can be much wider, and therefore stiffer. The bearings are sealed, so once again the internals are ‘fire and forget’. For some ungodly reason, some manufacturers are now fitting these into alloy frames (as if they need improved stiffness) which means that the metal shell and the metal bearing rub against one another causing the whole frame to creak with every stroke. The trick here, to stop the creaking, is not to buy an alloy frame with a BB30. Or a carbon frame with an alloy BB shell and a BB30. Seriously. A thick pasting of grease, applied regularly to the inside of the shell, might help the situation if you’ve already bought said Boardman/Cannondale.
Headsets also come in different types, notably integral (often 1 1/8″, sometimes tapered to 1 1/2″ sealed bearings pushed directly into the frame) or external (usually 1″ cups screwed onto a threaded fork). For integral bearings, just apply a thin coat of grease to the inside of the shell and gently press in with a headset press. For external cups, these should be cleaned and repacked with grease annually, similar to hubs. Lithium grease, again, works wonders.
The only other internal part that springs to mind is the freehub body. There may or may not be another guide on servicing these, but in here we need to ensure that hub, pawls and springs can all operate smoothly. We *have* to have a clean, dirt free environment. I tend to use Shimano Mineral oil in here, because it’s so thin, but then again I service my freehub every couple of months. If you’re not that keen, a wet chain lube or a thin coat of White Lightening Crystal grease can work. Under no circumstances should any thick grease be applied in here. Stuff like ‘tenacious’ chain lube and lithium grease can gum up the whole sensitive apparatus and stick pawls in ratchets/stop star ratchets disengaging from the hub body. It has to be thin. And it HAS to be clean. Remove all the bearings, degrease thoroughly [with a degreaser naturally]. Clean with a clean cloth, remove any remaining degreaser, dry either with cool air or time (don’t use a hairdryer, you risk warping parts), and put a droplet of mineral oil on each pawl. Massage it in to ensure good coverage. Put a couple of drops on the ratchet inside the freehub body, then slip it together. Give it a spin until you can hear each pawl engagement as a distinct ‘click’. If you can’t, take it apart, clean it better, and use decent lube like I just told you to, you numpty!
Cables need lube when putting on. An oil based thin lube, like wet chain lube or mineral oil can smooth cable actuation and keep the outers from rusting. Just put a small amount on when fitting, don’t worry about redoing it. For those of you with high end groupsets, consider a polymer cable system. Shimano’s coated Dura Ace cableset is pretty damn good.
Now, lets talk about Chain lubing:

Use Lube image by Angela Richardson
Whatever you’re doing, chances are you’re doing it wrong. I had one gentleman storm out of my shop giving us all abuse because we suggested that WD40 was not a suitable lube for his chain. He’s been doing it wrong for 35 years, apparently, and got quite attached to doing it wrong, and was enraged when a qualified mechanic thought he should know that there was a better way.
So, if you’re reading this, don’t take offence. Just know that there are a lot of lubes for a lot of riding styles and conditions – and while there are compromises, GT85 and WD40 are not suitable lubes under any conditions.
So as we’re here, lets start with WD40. ‘Water Displacer 40’ was the 40th iteration of it’s inventors (you guessed it) Water displacement formula. In order to push water out of tight spots and prevent it’s reentry, WD40 is very thin and has a deep penetrating effect. It’s highly flammable and a volatile solvent. This thin, solvent property provides its most useful cycle related application – cleaning.
While to remove thick, encrusted dirt (like on old hub bearings) a stronger degreaser is needed, for chains and other minor degreasing jobs WD40/GT85 works a treat. Spray it on a cloth, then grab hold of your chain and watch the gunk wipe away. GT85 is basically the same stuff, but it leaves a teflon coating which does serve to provide a long term lube for things that don’t move a huge amount. Like door hinges. And drawers. That is the limit of it’s usefulness. Is you bike chain a water filled crevice, a door hinge, or a drawer? No? Then don’t use a solvent intended for that, then.
WD40 also serves to help us unseize stuck parts. You know, when you didn’t use assembly grease, like I told you to.
So what lube should you be using?
Wet: Oil based, Wet lube is ideal for wet and muddy conditions where a water based lube would get washed away.
Dry: This is kind of like a talcum powder suspended in solvent. It penetrates deep into the chain, then the solvent evaporates, leaving a layer of slippery solid behind. Ideal for long dry rides or sandy/dusty conditions where wet lube would be turned into a sand paste.
Ceramic: These can be wet or dry, ceramic lube has nanoparticles that leave a protective coating on the chain, enhancing it’s life and making shifting smoother and quieter. It is sometimes branded as ‘Stealth’ lube.
Chain lube usually comes in two containers: a spray can and a bottle.
Spraying lube around tends to cock up brake surfaces, pads, internal greases etc, so stay clear. Buy bottled lube or not at all.
When applying lube to the chain, we don’t just throw it on. To do so would likely overlube, meaning that road debris is more likely to stick to it, and any dirt already on the chain is going to get carried into the rollers and booger them pretty quick. First grab that WD40 that you’ll never need and spray it liberally onto a bit of cloth. Grab hold of the bottom of the chain with the cloth and turn the crank backwards, pulling the chain through the cloth. This should really be done after every wet ride, but compromises exist for a reason. I don’t even bother with my Ultegra 11-speed chain. Do it before every lubing though. While you’re there, just touch the cloth to the jockey wheels of the rear dérailleur as the chain is moving to clean the gunk off there.
When the chain is clean(ish), apply the bottle of lube to the bottom of the chain, just in front of the lower jockey wheel and turn the crank backwards. You want a thin line of lube to form down the centre of the chain – not too much. Turn the crank backwards for a minute or so after you’ve lubed it – this helps the lube sink into the rollers – then wipe of the excess with your rag – again grabbing the bottom of the chain and running the crank back.
Do this every couple of weeks or every 200 miles, whichever is sooner.
Every 600 miles or so, take the chain off and clean it thoroughly. Follow a guide from Sheldon Brown or something on Youtube on how to do this. Dry and lube thoroughly afterwards.
What not to lube:
Tyres. Yes, people can be that silly.
Brake discs. Seems obvious, but you’d be surprise how many people try to resolve a squealing disc brake with a touch of lube. The squealing is caused by glazed pads leading to a lack of friction, not by too much friction. If you have lubed the disc, you’ll need new rotors and new pads.
So there you have it. The right grease, in the right place, in the right amount. Simples.