by Jack Holroyde | Mar 5, 2014

Dirty Bicycle Chain Image by hlaricca
For those of you that don’t know, when I’m not praying or meditating on the meaning and worth of pain, I work in a bike shop. Selling, maintaining, riding.
One of the questions I get asked a lot in the shop is ‘what is the right lube to use on a bike?’
There are as many types of lube as there are applications for it, and with good reason. Most of the time people are using the wrong lube for the wrong application and directly or indirectly bugger everything up.
Who hasn’t seen a chain laden with sludge, with slop dripping off the jockey wheels and cassette?
That’s not lube – it’s dirt. Dirt that’s stuck to the lube.
Who hasn’t seen a completely rusted chain, or a headset so gone that there’s rust dribbling down the fork? That’s caused by water ingress past the grease.
All of these parts have been lubed, but what has gone wrong is either the quantity, the quality or the regularity of the greasing has gone wrong.
I guess I’m going to go over parts of the bike, starting from the inside out and try and explain what each part does, what the function of the grease is in that scenario, and therefore how much lube, and what thickness of lube to use.
Before we start, we need to talk about assembly grease. Most parts on a bike that require a screw thread are made of aluminium alloy. One of the important things to note about aluminium is that similar to iron, when exposed to oxygen it forms an oxide, which unsurprisingly is called aluminium oxide. When alloy and alloy screw or press into each other, in time the separate pieces oxidise, much like rust, and ‘dry weld’ themselves together. Cue new chainset when someone hasn’t put a dash of grease on the pedal screws before fitting them. Cue new frameset when someone hasn’t greased the bottom bracket threads before tightening the cups.
Grease provides a barrier between the alloys, stopping them seizing. It also serves to keep air (and therefore oxygen) and water away from the greased part.
Assembly grease is cheap, and you don’t need much, but whenever you are fitting two pieces of alloy together, you *must* use it. Lecture over.
There is also carbon paste, for putting carbon things together. This contains tiny particles of carbon, which act like a grit and bite into the parts to stop them slipping. If you’re putting a carbon seat post into an alloy or carbon frame, be sure to use carbon paste. Else your seatpost will slip and you’ll find your groin slammed into the top tube. And that’s not pleasant. I can testify.
So, bearings and internal greasing:
First up, my go-to lube for internals and bearings is Finish line Teflon Grease. It comes in a tube to which you can attach a Finish Line grease gun, which makes greasing hubs and bearing internals an absolute doddle. It also works great as an assembly grease. When I say grease, I mean this stuff unless I specify otherwise. The grease is about a fiver, the gun about 20 quid, but should last forever. This stuff shouldn’t be used on rubber seals though. The lithium in it eats rubber. If you’ve got a part with a rubber seal, I’d recommend White Lightning Crystal Grease.
Bottom brackets, like the hubs, are an axle spinning in a ring of bearings. The BB bearings come in three main types – cartridge, threaded cups and press fit sealed bearings.
In a cartridge system (such as Square taper, Octalink, PowerSpline), the axle and bearings are contained in a single unit. The axle sticks out either side to provide space for the cranks to be fastened to. To get to the bearing we must (once the BB is removed) peel back the weather seals and apply the lube directly onto the bearings which are just inside the shell of the BB.
As they’re so close to the surface, and the BB gets a regular dosing of road spray, the lube we use needs to concentrate on keeping water and other solvents out, keeping the bearing running smooth and must be thick enough to stick around for the long term. Even the most die hard of us won’t strip the seals off a BB more than once a year – else we’ll knacker them through our over zealous intrusions.
To perfectly fulfil this purpose must be *thick*. Wayne Rooney thick. Almost solid.
So on your cartridge BB and hub internals, you want to have the thickest, most water resistant grease you can get your paws on. I tend to use lithium grease because it’s thickish, water resistant and messy, and a BB service isn’t a BB service without your clothing being covered in greasy smears.
Threaded cups are a lot more simple. They’re sealed, you can’t get in. When you bugger them because you were careless with where you were spraying degreaser when cleaning your drive train, you chuck them out and replace them. Good thing is they aren’t expensive. Bad thing is, you really need to be taking your bike to a shop to get it changed. However, assuming you have a Hollowtech II tool, a torque wrench and a work stand, you just put a bit of assembly grease on the threads and whack it in.
Press fit bearings (BB30, BB90, PF30 etc) are when the sealed bearing themselves are just pressed into the frame with no cups, either by hand or with a pressing tool. The benefit is that the BB shell (the tube in the frame through which the cranks pass) can be much wider, and therefore stiffer. The bearings are sealed, so once again the internals are ‘fire and forget’. For some ungodly reason, some manufacturers are now fitting these into alloy frames (as if they need improved stiffness) which means that the metal shell and the metal bearing rub against one another causing the whole frame to creak with every stroke. The trick here, to stop the creaking, is not to buy an alloy frame with a BB30. Or a carbon frame with an alloy BB shell and a BB30. Seriously. A thick pasting of grease, applied regularly to the inside of the shell, might help the situation if you’ve already bought said Boardman/Cannondale.
Headsets also come in different types, notably integral (often 1 1/8″, sometimes tapered to 1 1/2″ sealed bearings pushed directly into the frame) or external (usually 1″ cups screwed onto a threaded fork). For integral bearings, just apply a thin coat of grease to the inside of the shell and gently press in with a headset press. For external cups, these should be cleaned and repacked with grease annually, similar to hubs. Lithium grease, again, works wonders.
The only other internal part that springs to mind is the freehub body. There may or may not be another guide on servicing these, but in here we need to ensure that hub, pawls and springs can all operate smoothly. We *have* to have a clean, dirt free environment. I tend to use Shimano Mineral oil in here, because it’s so thin, but then again I service my freehub every couple of months. If you’re not that keen, a wet chain lube or a thin coat of White Lightening Crystal grease can work. Under no circumstances should any thick grease be applied in here. Stuff like ‘tenacious’ chain lube and lithium grease can gum up the whole sensitive apparatus and stick pawls in ratchets/stop star ratchets disengaging from the hub body. It has to be thin. And it HAS to be clean. Remove all the bearings, degrease thoroughly [with a degreaser naturally]. Clean with a clean cloth, remove any remaining degreaser, dry either with cool air or time (don’t use a hairdryer, you risk warping parts), and put a droplet of mineral oil on each pawl. Massage it in to ensure good coverage. Put a couple of drops on the ratchet inside the freehub body, then slip it together. Give it a spin until you can hear each pawl engagement as a distinct ‘click’. If you can’t, take it apart, clean it better, and use decent lube like I just told you to, you numpty!
Cables need lube when putting on. An oil based thin lube, like wet chain lube or mineral oil can smooth cable actuation and keep the outers from rusting. Just put a small amount on when fitting, don’t worry about redoing it. For those of you with high end groupsets, consider a polymer cable system. Shimano’s coated Dura Ace cableset is pretty damn good.
Now, lets talk about Chain lubing:

Use Lube image by Angela Richardson
Whatever you’re doing, chances are you’re doing it wrong. I had one gentleman storm out of my shop giving us all abuse because we suggested that WD40 was not a suitable lube for his chain. He’s been doing it wrong for 35 years, apparently, and got quite attached to doing it wrong, and was enraged when a qualified mechanic thought he should know that there was a better way.
So, if you’re reading this, don’t take offence. Just know that there are a lot of lubes for a lot of riding styles and conditions – and while there are compromises, GT85 and WD40 are not suitable lubes under any conditions.
So as we’re here, lets start with WD40. ‘Water Displacer 40’ was the 40th iteration of it’s inventors (you guessed it) Water displacement formula. In order to push water out of tight spots and prevent it’s reentry, WD40 is very thin and has a deep penetrating effect. It’s highly flammable and a volatile solvent. This thin, solvent property provides its most useful cycle related application – cleaning.
While to remove thick, encrusted dirt (like on old hub bearings) a stronger degreaser is needed, for chains and other minor degreasing jobs WD40/GT85 works a treat. Spray it on a cloth, then grab hold of your chain and watch the gunk wipe away. GT85 is basically the same stuff, but it leaves a teflon coating which does serve to provide a long term lube for things that don’t move a huge amount. Like door hinges. And drawers. That is the limit of it’s usefulness. Is you bike chain a water filled crevice, a door hinge, or a drawer? No? Then don’t use a solvent intended for that, then.
WD40 also serves to help us unseize stuck parts. You know, when you didn’t use assembly grease, like I told you to.
So what lube should you be using?
Wet: Oil based, Wet lube is ideal for wet and muddy conditions where a water based lube would get washed away.
Dry: This is kind of like a talcum powder suspended in solvent. It penetrates deep into the chain, then the solvent evaporates, leaving a layer of slippery solid behind. Ideal for long dry rides or sandy/dusty conditions where wet lube would be turned into a sand paste.
Ceramic: These can be wet or dry, ceramic lube has nanoparticles that leave a protective coating on the chain, enhancing it’s life and making shifting smoother and quieter. It is sometimes branded as ‘Stealth’ lube.
Chain lube usually comes in two containers: a spray can and a bottle.
Spraying lube around tends to cock up brake surfaces, pads, internal greases etc, so stay clear. Buy bottled lube or not at all.
When applying lube to the chain, we don’t just throw it on. To do so would likely overlube, meaning that road debris is more likely to stick to it, and any dirt already on the chain is going to get carried into the rollers and booger them pretty quick. First grab that WD40 that you’ll never need and spray it liberally onto a bit of cloth. Grab hold of the bottom of the chain with the cloth and turn the crank backwards, pulling the chain through the cloth. This should really be done after every wet ride, but compromises exist for a reason. I don’t even bother with my Ultegra 11-speed chain. Do it before every lubing though. While you’re there, just touch the cloth to the jockey wheels of the rear dérailleur as the chain is moving to clean the gunk off there.
When the chain is clean(ish), apply the bottle of lube to the bottom of the chain, just in front of the lower jockey wheel and turn the crank backwards. You want a thin line of lube to form down the centre of the chain – not too much. Turn the crank backwards for a minute or so after you’ve lubed it – this helps the lube sink into the rollers – then wipe of the excess with your rag – again grabbing the bottom of the chain and running the crank back.
Do this every couple of weeks or every 200 miles, whichever is sooner.
Every 600 miles or so, take the chain off and clean it thoroughly. Follow a guide from Sheldon Brown or something on Youtube on how to do this. Dry and lube thoroughly afterwards.
What not to lube:
Tyres. Yes, people can be that silly.
Brake discs. Seems obvious, but you’d be surprise how many people try to resolve a squealing disc brake with a touch of lube. The squealing is caused by glazed pads leading to a lack of friction, not by too much friction. If you have lubed the disc, you’ll need new rotors and new pads.
So there you have it. The right grease, in the right place, in the right amount. Simples.
by Bikeboyslim | Apr 14, 2013
 Can you ever have too many bikes?
Well I suppose it depends who you ask the question of! In our household I would naturally answer No of course you can never have too many, however my wife might just answer rather differently posing a question of her own. How many bikes can you ride at any one time!
Seriously though you do need a bike for each discipline you ride, don’t you. Who in their right mind would use a track bike to ride a BMX course and like wise who would ride downhill on a CX (cyclocross) bike! OK so I have chosen some extremes but I still recon that you need more then one bike.
Unlike some I am not totally mad with the number bikes I have and I have a sensible mix, a road bike (actually two if I am honest), an full suspension XC MTB, a track bike and a BMX.
Over the years the type of riding I have been doing has changed a little and the Full Suspension XC seems a bit of an over kill for riding things like Preston’s Guild Wheel and some of the disused railway lines locally, however a full carbon road bike does not quite fit the bill either! Leaving me with a bit of a conundrum, what to get to fill the gap? A hard tail MTB to replace the Full Sus or a CX bike?
Hmm tricky coz I really do not want to get rid of the Full Sus because it is really useful for those days out in the hills and trail centres. I know I could do these on a hardtail but then just maybe this would be over kill for the local trails.
Yes you guessed it I plumped for a CX bike, as I said you can never have too many bikes!! But I set myself a challenge I had to do this on a budget no more then £300 could be spent. I had a donor bike for most of the drive train and bars etc, so all I needed would be a frame, brakes, wheels and tyres.
My natural port of call for these parts was going to be ebay or discount online stores. First things first find out what is needed for a CX bike and which parts are the most robust for a bit of a hack bike and how much parts typically are. This is key to avoid over spending on eBay. It always amazes me that many buyers on ebay get carried away. The worst I have seen is a set of wheels go for £30 more then the buy now option for the same set from the same seller who had one set on open bid and another set available as buy now!
The donor bike was a Specialized Allez Sport with Shimano Tiagra triple chainset. I pondered long and hard over the triple chainset as my gut instinct was to go for a double CX specific or a double compact until I read this article http://bikehugger.com/post/view/the-rise-of-the-compact-crank which clearly defined the pit falls of a compact and the benefits of the triple. The decision to stick with the triple also meant I had less to buy with my budget, meaning more to spend on the frame.
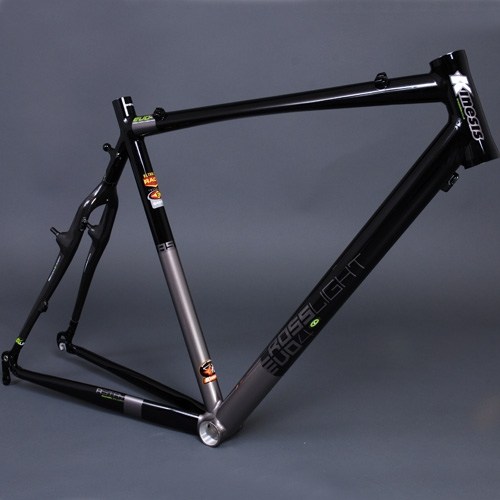
Kinesis Crosslight Evo4 Cyclocross Frame 2010spend on the frame.spend on the frame.
Step 1 Frameset.
Having trawled eBay and the internet it seemed that the choices boiled down to a selection from:
- Graham Weigh frame and forks £199.99
- Forme Hiver (Paul Milnes) £274.99
- Paul Mines CT Wing £295
- Dolan Multicross £249.99
From these the best value for money seemed to be the Dolan as it included a seat post, headset and front cable hanger. However this did not leave me with much in the budget for wheels. So back to the drawing board and review the second hand options via eBay. Patience and timing had to be the watch word now. As I write there are very few frames on open bid. I missed out on a couple by a few pounds but I had set my target and was sticking to it.
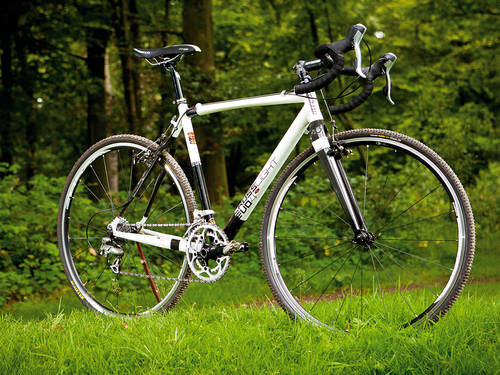
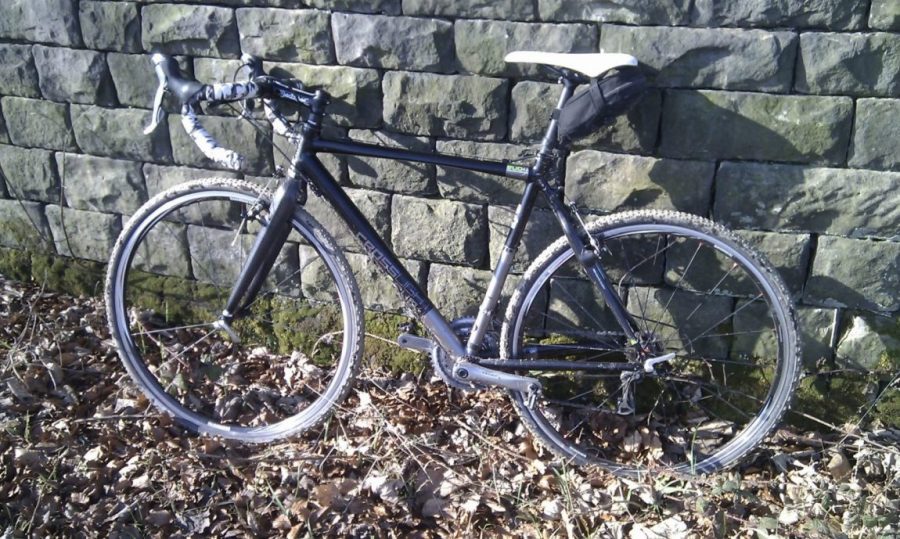
Finally I hit the jackpot with a rather good Kenesis Crosslight EVO4 and BikeRadar’s review seemed to rate the frame
(http://www.bikeradar.com/gear/category/bikes/cyclo-cross/product/review-kinesis-crosslight-evo-4-11-45404)
 so in for a penny in for a few quid!
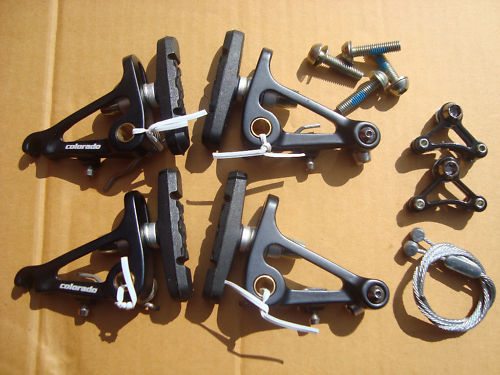
Step 2 Brakes
The frameset was set up for cantilevers only but which set to get? Shimano CX50’s, Avid Shorty, Tektro V brakes, Empella Froglegs or Tektro CR 520?
Cash had to be king here and simplicity had to rule so a big thanks to Paul Milnes eBay store Tektro Colorado’s at £21.99 a full set it was
Step 3 Wheelset.
I struck gold here as a friend who had switched from a CX bike to a 29er still had a set of Shimano wheels that came off his Cannondale CX bike so £40 landed me 5 tyres and tubes and a set of Shimano WH-RS10’s. Not the most amazing 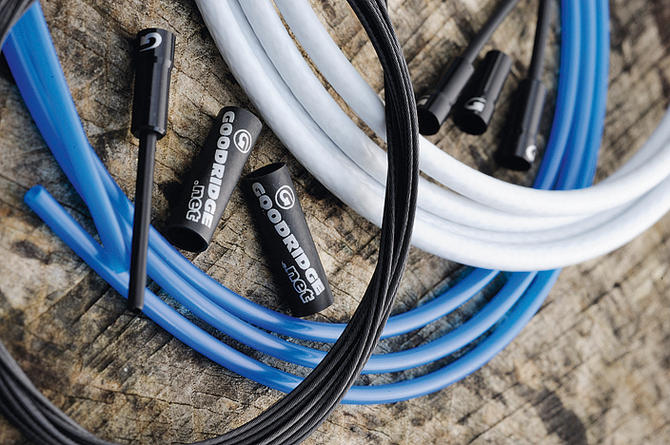 wheelset in the world but functional.
Step 4 cable set.
Having used a mix of manufacturers in the past decided to try a new manufacturer for me and bought a set of low friction PTFE-coated stainless steel Goodridge cables from Chainreaction (user reviews 4.1/5).
 The Build.
The first thing to do was to strip down the donor bike a Specialized Allez Sport running a triple Shimano Tigra groupset. I would be using everything from this bike except the caliper brakes and saddle, or at least that was the plan.
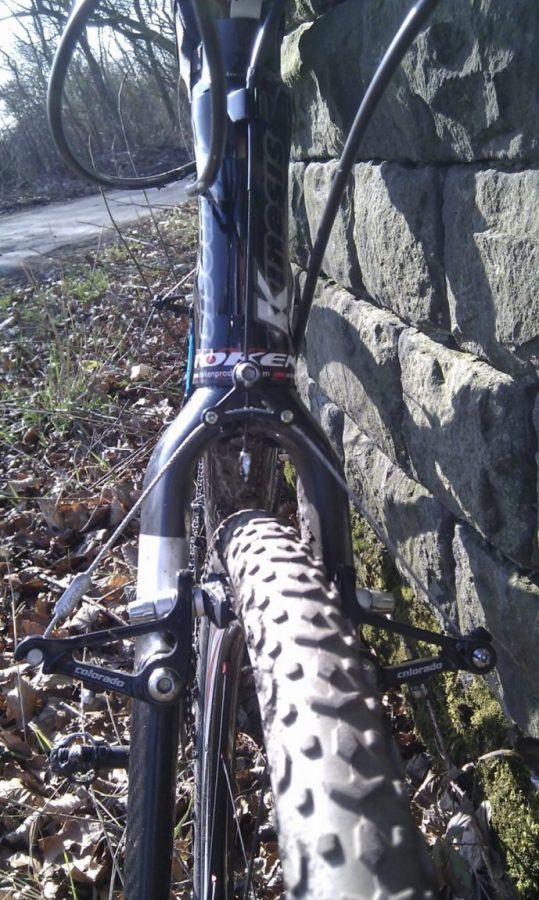
As soon as the frame arrived from its original Coleford Gloucestershie home it was time for close inspection. The frame was pretty much as described on eBay except for a very small dent on the downtube and a small gouge hidden under a sticker on the headtube. If I am being really picky the packing of the frameset could have been better and I was rather disappointed that the seller had not used fork and rear end frame spacers to avoid crushing during shipping as I had requested. The good news was the frame was in full alignment and ready to build.
A quick clean down and removal of old cable protectors and it was time to apply helicopter tape to areas which might suffer from scuffing, cable wear or chain slap.
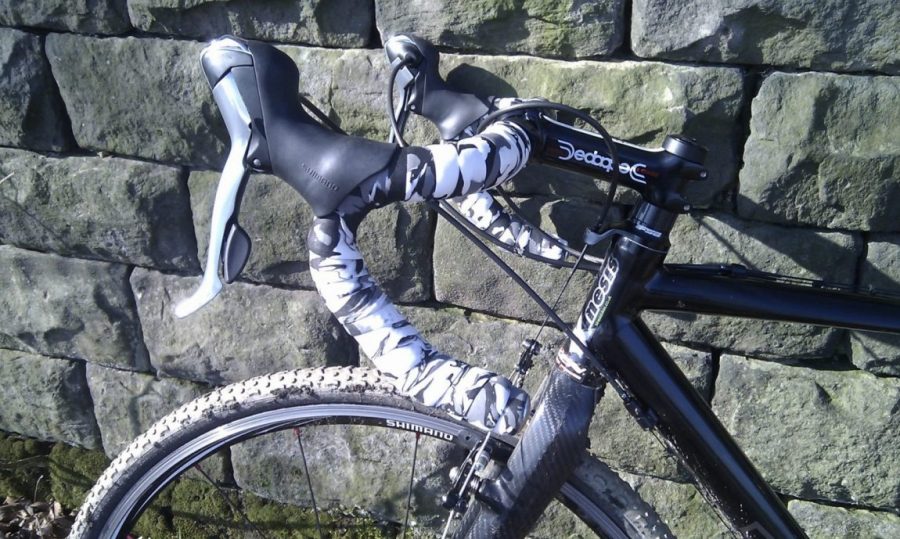
This done it was in with the bottom bracket, crankset and front mech, quickly followed by rear mech, handlebar stem, seat post, handlebars and finally cantilever brakes and wheels. Time to check the fit. First hop on and it was immediately obvious that the handlebar stem was going to be a tad too short. So out with the tape measure and size up the fit vs my road bike. It was very obvious that the 100mm stem going to be too short. 110 mm might just work but even this might leave me a little hunched up, so it would need to be 115 or 120mm. I plumped for the longer of the two a quick trawl on the internet and a 120mm Deda Zero 1 was acquired and fitted. Perfect sizing and hey presto one bike ready for setting up with cables.
The Goodridge cables where new to me and I was itching to find out how good they really where. Unlike normal brake cables which have flat spiral wound metal the Goodridge set are the same set up as a gear cable outer, with steel strands in the sheath orientated in the same direction as the cable (along the length of the outer). For gear cables this reduces compression of the outer and improves reliability of indexing.
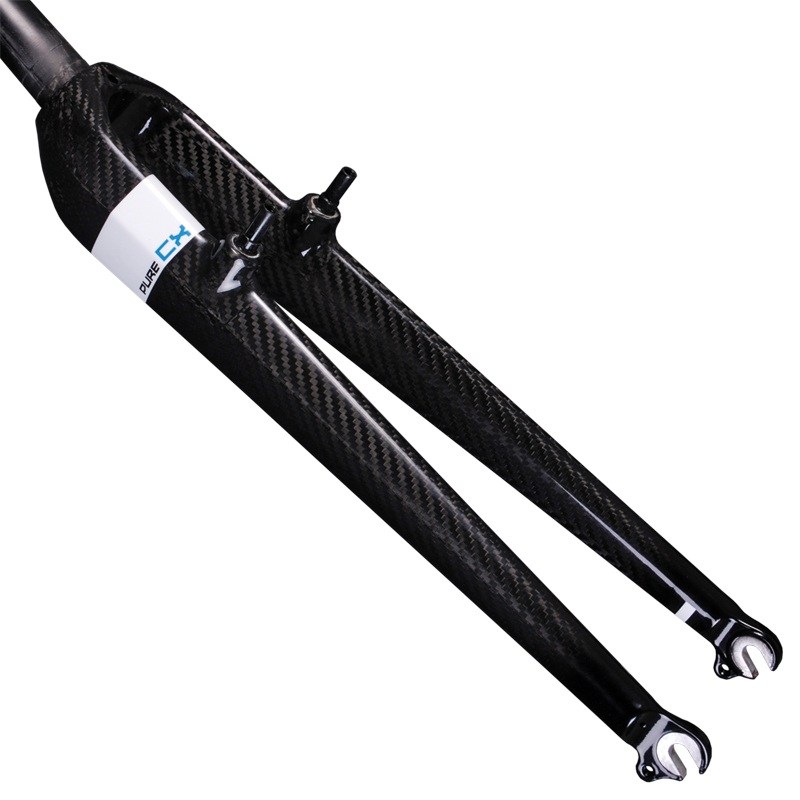
Kinesis Pure CX Cyclocross Fork
I will be interested to see the effect on braking. I suspect that it will improve modulation and feel reducing any sponginess caused by the outer compressing during braking. The brake cables certainly proved to be very stiff and somewhat tricky to cut.
With careful measuring and cutting (measure twice cut once) all was well with both gear cables and brake cables. A really nice touch with the Goodridge set is the long leadin tails on the cable ferrules allowing for improved
water and grit protection. With careful fitting of the blue plastic outer it is possible to run the cables fully water and grit proof.
All finished time to ride.
First Impressions.
 WOW this is a quick bike. From the first turn of the pedals it is clear that this is a race bike with a real eagerness to move forwards quickly. To quote What Mountain Bike’s review
“The Kinesis Crosslight Evo is a highly evolved racer that proves even hardcore cyclo-crossers can be a fun and versatile trail/tarmac crossover option on non-race days.”
Very true and great fun was had on the first few rides proving that it was a very good choice to go CX and not Hardtail. However as time went on a couple of limitations started to show through and once again these confirmed the finding of Guy Kesteven
‘A major – but surprisingly common – technical terrain limitation soon becomes clear though. While the Tektro cantilever brakes on the Kinesis are usefully powerful – at least in the dry – the brake judder caused by fork flex on rough terrain makes the front wheel skip alarmingly.’
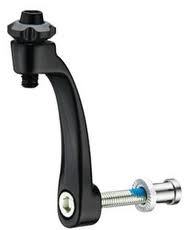 front wheel skip was the least of the problems the fact was that the amount of front brake judder, especially during descents, made the front brake totally redundant. Solution simples, fit a fork crown cable stop to replace the headset one. Cost £8.99 from Paul Milnes. Fitted cable recut and off we go again. Amazing the front brake is a different beast no judder at all even under the most powerful braking, bringing a high level of confidence to tackle technical descents with ease. Does make you think as to why Kenesis do not fit this simple device to the OEM bike in the first place. £8.99 is not a major cost to transform the ride.
Conclusion
MTB or CX well this being my first CX ride ever I am totally sold. This has to be the perfect tool for riding the local disused railway lines and simpler off road tracks, where to be honest even a hard tail MTB would be overkill.
What is even better is that I have managed to build a CX worth over £1000 for £300, result! Will I get rid of my Full Sus MTB? No it is horses for courses and to attack trails like Gisburn, Winlatter, Grizedale etc this will still be the machine to use but for a qucik blast along many of the SUSTRANS off road routes the CX EVO 4 will be perfect.
If you have never tried a CX bike and want to venture offroad but do not want to wreck your best road bike then find a frame on eBay and switch all your winter hardware onto a CX frame.
by Paul Harris | Mar 15, 2013
Competitiveness, an urge to do your best, is within human nature, a part of all of us. But in the drive to further yourself, there are steps that you need to take – only the very few are born with a natural ability at any sport, and even for them there’s time to be spent and effort expended in order to hone skills and enhance physical attributes. Cycling is not immune; indeed, there are not many sports where the amount of time you put in so clearly has an impact in the amount you get out. So it behoves you to spend time in the saddle if you want to improve, and part and parcel of that is that there are boundaries to cross in your long personal voyage of self-improvement. I’ve just crossed two of them – my first sportive, and my first half-century.
The event was a new one – the Rawlinson Bracket commemorates the untimely passing of Nick Rawlinson, who passed away in his sleep at the shockingly unfair age of thirty. A keen cyclist, Nick was training for the Maratona dles Dolomites and his first season of racing – accordingly, his friends and family put together the Rawlinson Bracket to allow riders to experience some of the roads Nick knew well and loved to train on, but also to raise funds and awareness for Sudden Adult Death Syndrome. Whilst not a county particularly noted for verticality, Warwickshire nevertheless boasts some fairly beastly climbs along the Edgehill escarpment, and although the more leisurely 24 mile Bottom Bracket would give them a swerve, the 50 mile Top Bracket would utilize these and other climbs to the full.
Registered with British Cycling, online registration and entry was simplicity itself, and a couple of weeks before the event, my event number and on-the-day instructions hurled themselves through the letterbox. The day itself dawned grey and distinctly chilly, but at least it looked dry with no precipitation – parking at the Heritage Motor Centre, however, there were undeniable flakes of snow tumbling from the slate-coloured sky, although we were blessed to have nothing heavier fall during the event. Signing on was just a matter of turning up and signing your name in the appropriate place before heading out into the cold to get kitted up, and one thing was becoming very in-your-face apparent; although nothing was falling from above and the roads were dry, it was painfully, blisteringly cold. I was pretty well prepped, but in a moment of jaw-dropping stupidity, I’d left the winter gloves at home in favour of some slightly cooler* handware, cooler in both senses of the word. With Team NTG pedalling nervously to the startline, my fingers first started to protest, then yell angrily, then finally start to fall silent – and numb.
The briefing was cheerily delivered, useful and to the point, and before we knew it, we’d been set free and were off and running. From the start, the key note of interest was our fellow participants zipping past us at great pace and then disappearing into the distance – Team NTG’s scratch squad were a fairly fit bunch but they were carrying a hybrid-mounted great pudding in the form of your correspondent, and although I had been prepared for Vince, Jon and Steve to similarly make themselves very small on the horizon in no short order, I was very grateful to them for riding at my gentle pace. For the first mile or two, we followed the B4451 towards the amusingly-monitored Bishop’s Itchington and although traffic was by no means heavy, there were a few cars about – once we turned onto Knightcote Road, however, we were into the lanes and the remainder of the ride was blissfully quiet.
It was still flat, though, and digits were definitely on the chilly side. Riding two by two, we pedaled along in amiable fashion, honking about the cold and hoping for a hill to warm us up – Vince was on a box-fresh spanking new Specialized Allez bought only the day before, settling in and reveling in the step up from his Apollo hybrid.
It wasn’t long before we were passing Northend Manor, which meant Burton Dassett and the first serious climb of the day wasn’t far off. Burton Dassett is a lovely piece of parkland that normally calls on you to be shoo’ing sheep out of the way between heavily-gasped breaths – this time there were no sheep in the road as we passed, although my companions made like mountain goats and quickly dropped me. I wasn’t bothered; although tactics hadn’t been discussed, I’d half had it in mind that they might scoot off and ride at their own pace, which wouldn’t have bothered me – I knew that 50 miles would be quite a test for me, and that I couldn’t afford to try and match an unachievable pace, but if they wanted to test themselves, I certainly wouldn’t begrudge them. I also knew from riding with Jon that my modest climbing pace was uncomfortable on his steeper-geared Genesis Croix De Fer, so I was unsurprised that the others would ride away from me when it got steep. What was pleasing, however, was that the others took it steady on the ride away from the top, and it wasn’t long before I was back amongst them.
In companionable fashion, therefore, we proceeded along the way chatting as we went, the next challenge being a climb up through the village of Shotteswell. This led us to the B4100 which runs from Banbury to Gaydon and forms a part of my regular commute, so I was overjoyed to launch myself down the familiar Warmington Hill in spite of the biting wind – by this time, even my trendily-attired fingers were adequately warm…
Turning west before the military camp, I gulped down a gel before we hit the B4086, turning south to aim at Knowle Hill. Knowle Hill is a proper climb, not too long (little more than half a mile), and the guys again worked their way ahead of me as we hit 14% – I’d done a recce a couple of weeks before, as I knew it to be an awesome piece of downhill tarmac, so I knew I was capable of riding up it in the middle ring, but it was still a bit of a shock to see dismounted riders pushing up the hill. My sense of inferiority born of taking a lowly hybrid to the start line against a sea of proper road kit diminished with every revolution of the granny ring.
Our ascent of Edgehill marked an approach on the halfway mark, and the rest stop at the top of the hill gave me time to assess – I felt ok, pretty good after a banana, and in my head there was only one more serious climb left. I’d had a bit of a play along Edgehill prior to the event, and thought I had things covered, but although I felt strong on the restart, once we’d descended into the picturesque village of Tysoe (there’s a great downhill on the way in – I unclipped the inside foot into a hairpin left just to be on the safe side, and my team members were asking if I was worried about impacting the scenery on the outside of the turn. Pff – bunch of old women). Tysoe led us onto Lady Elizabeth Hill which was a comparative long grind, at the top of which I struggled to make the time back up to the rest of the squad – I was definitely starting to lose strength. Just to make things more tricky, I managed to pull out an energy bar on a flat section shortly afterwards, but struggled to open the beast – as a result, I ended up trying to chomp on chocolate and orange as the road swooped up and down, turning the simple act of eating into a tricky prospect.
As we got to Compton Winyates Hill, passing the 35 mile mark, my legs had definitely got it into their collective head that they’d more or less had enough of this pedaling lark. Vince had to stop right at the foot of the climb to locate an errant gel, but came past me at a blistering pace on his way back to joining Jon and Steve – I was indifferent; by now it was all about trying to make the finish, and my legs felt like mush. Trying to generate extra power was like pushing water uphill.
The route then rejoined at the top of Lady Elizabeth Hill, and I sped gleefully down back into Tysoe before rejoining the lads just a couple of miles before Sunrising. I knew Sunrising of old – as a family we’d been driving up it on the way to Silverstone since the Seventies, and since I’d worked in Banbury, Sunrising had been a frequent part of the commute if I couldn’t face the motorway. I’d only cycled up it once, but it was and is the steepest hill I’ve cycled up so far. That was the end of January, and I’d managed to hold the middle ring, but on the day, little more than three weeks later, I had to drop to the granny ring almost as soon as the climb started; it seemed almost endless, but my bloody-minded spinning eventually had me round the top corner and at the apogee of the hill. From there I knew the route home – we’d cleared all the serious climbs. It was an overwhelming experience.
Once atop the escarpment, I put in some effort in aero mode to try and catch the rest of Team NTG, but we were through Edgehill before I rejoined with them. By then we were poised over Edgehill, a hill I’d ridden down a couple of times before and with my gravitational potential energy advantage, I managed to open a small gap on the rest of the team before we started to span the plain to Kineton. Putting in a turn to try and catch a couple of riders ahead of us, I gave it a dig before Vince took over, dragging us past them but also separating the team, the new Allez giving free expression to his prodigious ability. Steve gave vain chase as Jon and I worked our way more steadily home, but there was no doubting who finished with the most ammo in their legs.
Still, 50 miles, done; my first half century, and first sportive. It was a brilliant feeling just to finish the event, and it ranks high amongst my thus far meager athletic achievements. But complete it we did; cheerily run, the event was fun from start to finish and with over £4000 raised for SADS, there was a clear correlation between the fun had and the funds raised. No-one I spoke to had anything but praise for the event, and there was a pleasing finale when Steve and Jon looked to donate. When they went unsatisfied in their hunt for charity buckets, they asked a SADS-t shirted lady who advised them that there were no buckets, but they could leave contributions with her. In jest, Steve asked if they could be sure that contributions left with her would be safe and she smiled as she said that yes, they would be safe, as she is Nick’s mum. I thought it symbolic of the quality of the event that Nick’s family were there to pitch in, a year to the day after his untimely passing.
Nothing that I saw or heard leads me to conclude that the event was anything other than a complete success. I’ve no idea if there are plans to make it an annual event, but if there are, sign me up now!
*Coolness, of course, is in the eye of the beholder, but for me, the gloves I wore were as cool a pair as I own.
For more information SADS (Sudden Arrhythmic Death Syndrome) visit: www.sadsuk.org.uk
To learn more about Nick and details on The Rawlinson Bracket event visit: www.the-rawlinson-bracket.co.uk